

When working within Adobe Illustrator, you'll find yourself using the same colors over and over again.
Saving them to your Swatches panel is a great way to keep track of your colors (especially brand colors!) and work more efficiently.
In this mini tutorial, we will cover the basics of saving a swatch in Illustrator.

Here's how to do it:
Saving a New Swatch
- Open your Illustrator project file
- Select or create a object using the color desired
- With the object selected, open the Swatches panel (Window > Swatches)
- From the hamburger menu at the top-right of the Swatches panel, choose New Swatch
- Create a name for the new swatch and select whether it is a Process Color or Spot Color*, and select color mode
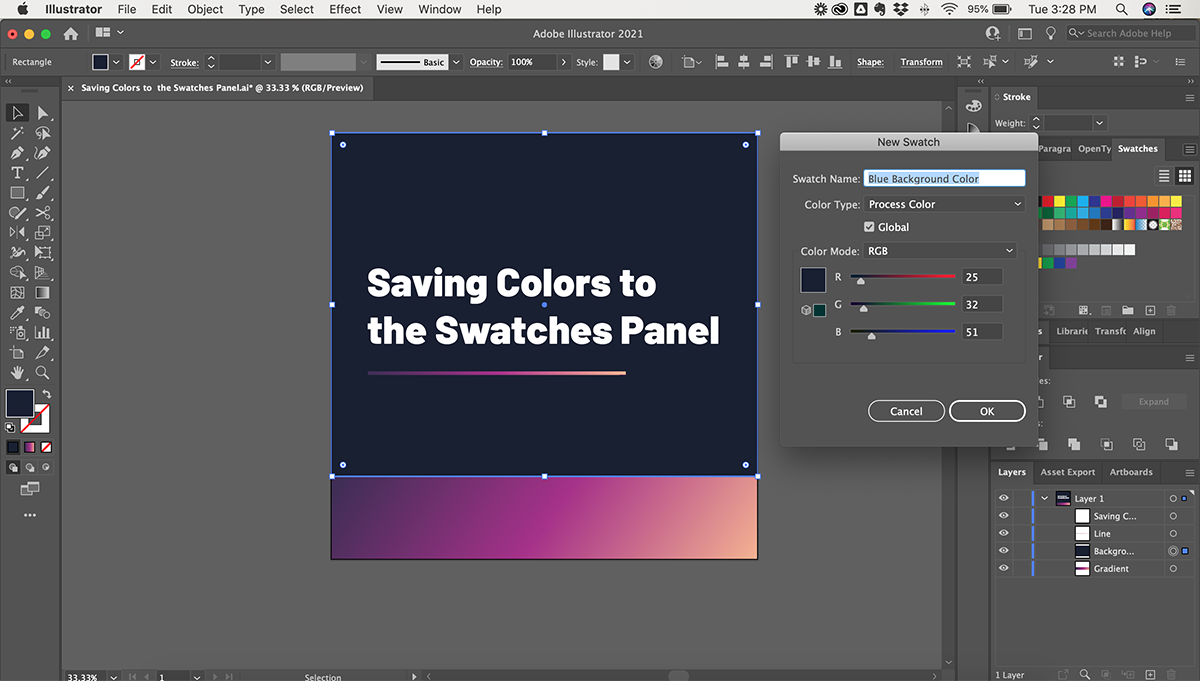
Pro Tip: Make sure the "Global" checkbox is selected when creating a New Swatch. This will allow you to edit the swatch later on if needed, and all objects using that color will update as well!
Editing a Color Swatch
- To edit an existing color swatch, simply double-click on the swatch (in the Swatches Panel), and the Swatch Options panel will open
- Edit the settings, and click OK
- If you are editing a Global color swatch, all shapes and text using that color swatch will update accordingly
👍 Support Us: Subscribe to our channel and help us continue providing these tutorials.
🌟 Regular Updates: We publish how-to videos for Adobe Illustrator regularly!
🔧 Expert Guidance: Learn Illustrator from our professionals and uncover exclusive tips!
