

Figma offers an array of tools and functions to help you with your interface designs. However, the tools can be confusing to those who are new to the platform. One such task is typing on a path.
You can easily create your own path and then add the text to the path to follow the curves and angles of the path. A final step is to remove the path’s stroke color so that only the text is visible in the shape of the path. Here is how to type text on your own custom path in Figma.
Table of Contents
Overview of Typing on a Path in Figma
- Type some text using the Text Tool
- Activate the Pen Tool
- Draw a path on the canvas
- Select the text and the path using the Move Tool
- Go to Resources > Plugin > To Path
- Click Run to start the plugin
- Adjust the settings in the plugin window
- Click Link
- Select the path
- Change the Stroke color to Transparent
Step-by-Step of How to Type on a Path in Figma
You can type in any text to add to a custom path you create, giving you complete customization options. However, a drawback of this method is that not all fonts work on the path, and you may need to change the font until you find one that works.
You can change the font after adding the text to a path, but it will be a more tedious process, so I recommend you edit the text font and color before you add the text to the path.
Type Some Text Using the Text Tool
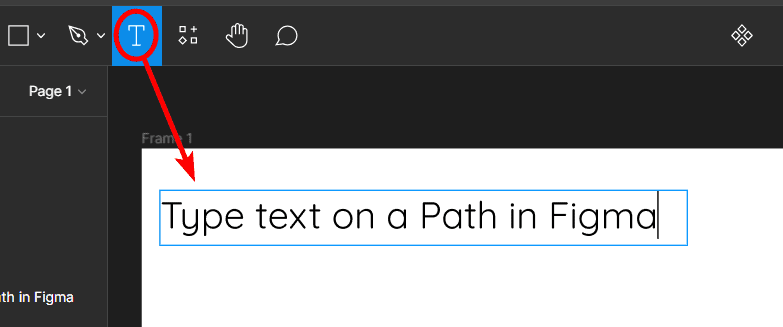
Once you have a blank project open in Figma, you can start the process by adding text to the page. To add text, select the Text Tool, drag on the canvas with your mouse to create a text block, then type in the text you want to add to a path.
You can also use the options on the right-hand side panel to adjust the font and text color as needed.
Activate the Pen Tool

Next, you must draw the path you want the text to follow. You can draw the path by selecting the Pen Tool or pressing P.
Draw a Path on the Canvas
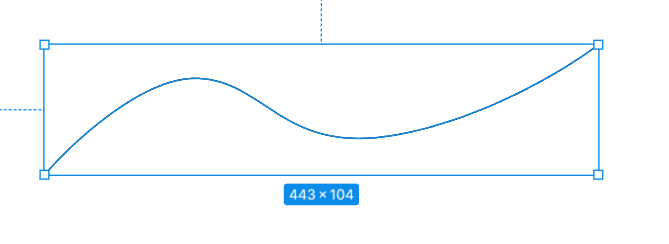
Then, click to add anchor points on the canvas and create a path. To create a curve, click to add a point and drag the mouse to create the curve.
When you are finished with the path, double-click or click once and press Enter to complete the path. You can create any path you want for the text to follow.
Select the Text and the Path Using the Move Tool
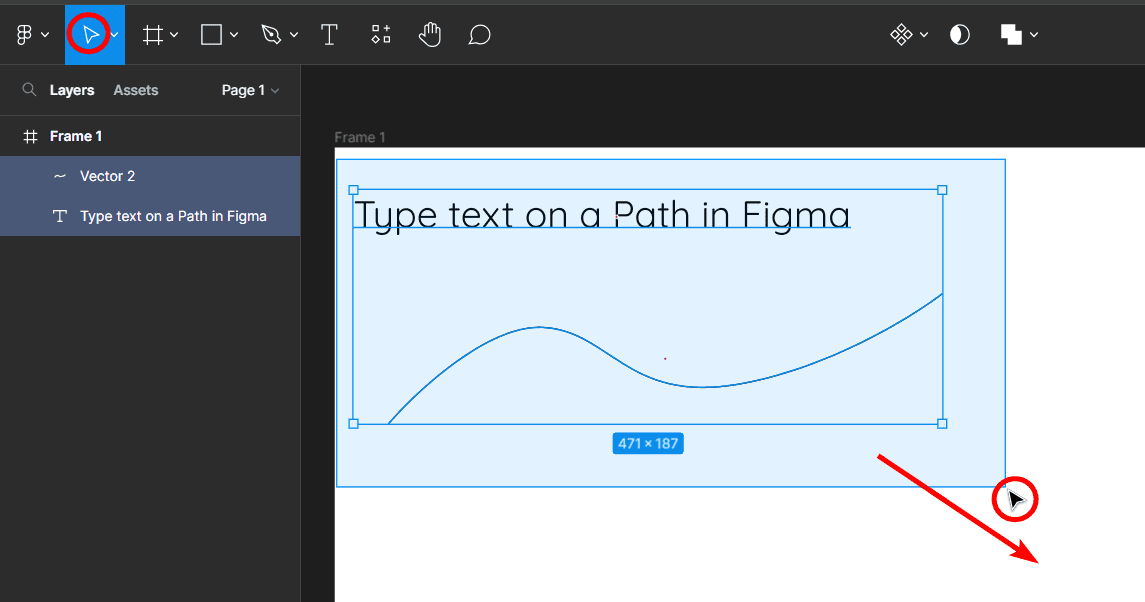
Now, you can select the text and the path using the Move Tool by selecting the tool from the bar or pressing V. Then, click and drag over both objects to select them.
Go to Resources > Plugin > To Path
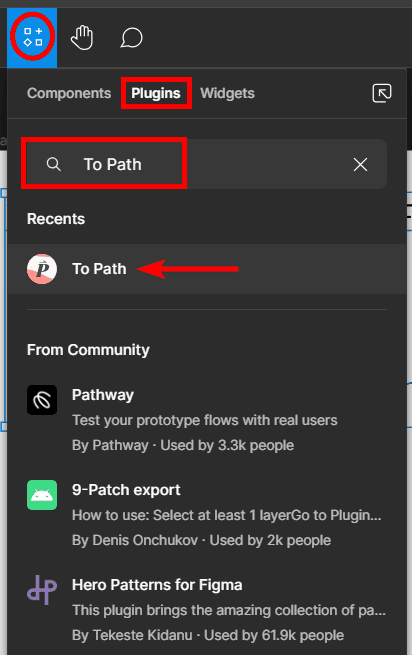
To add the text to the path, you need to use a plugin, which can be found in the Resources panel. To locate the plugin, open the Resources panel by clicking the icon or pressing Shift + I on Windows and Mac.
In the Resources panel, click on the Plugins tab, then type To Path into the search bar to find the plugin for this process. Click on the plugin to open it.
Click Run to Start the Plugin
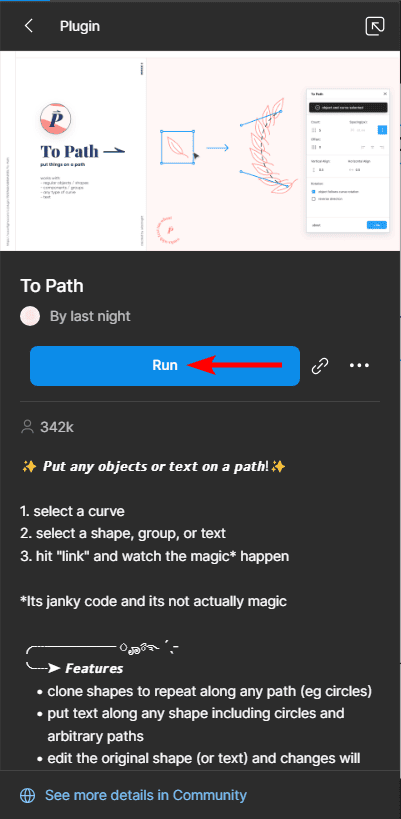
When the plugin opens in the panel, you will see information on what it does and how to use it. Click Run to start the plugin.
Adjust the Settings in the Plugin Window
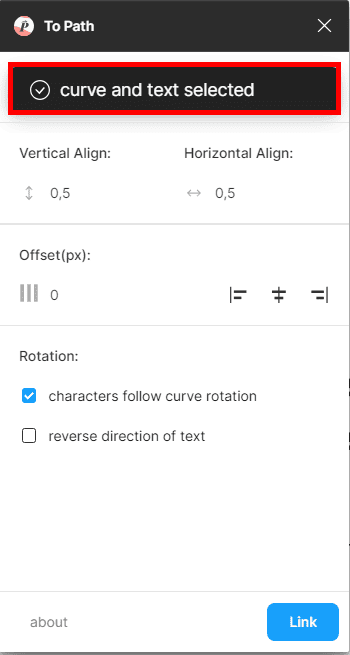
When you run the plugin, a window will open with the settings you can adjust for the plugin. Firstly, the window will show what is selected to be linked together. In this case, the curve I created and the text are selected.
Adjust the Horizontal and Vertical Align Options
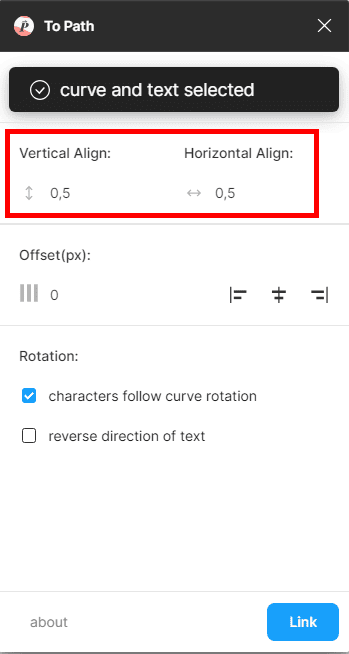
You can adjust the Horizontal and Vertical alignment options, which determine how the text will sit on the path, either in the middle of the line, above or below the line.
Adjust the Offset Option
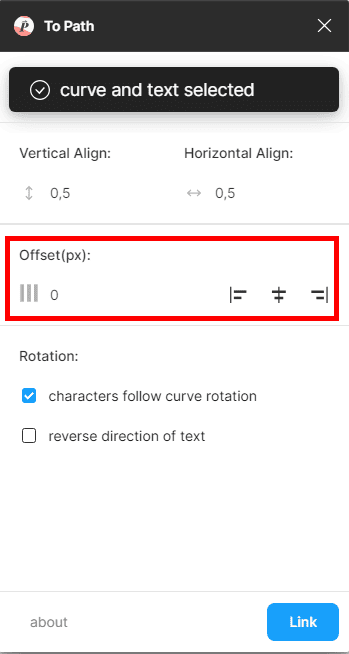
Next, the Offset option determines where the text starts on the line. You can set a specific pixel value or use the left, center, or right align icons.
Adjust the Rotation Options
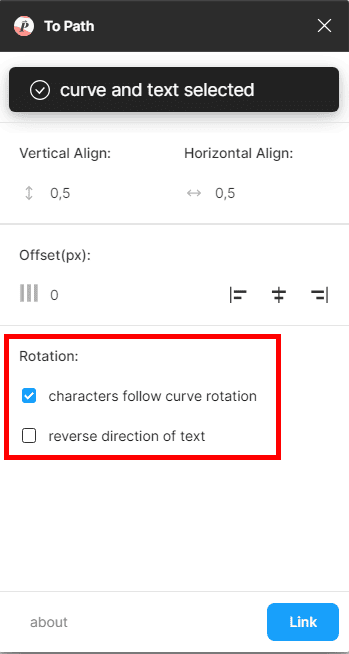
You can also select whether the characters follow the curve rotation and reverse the direction of the text.
Click Link
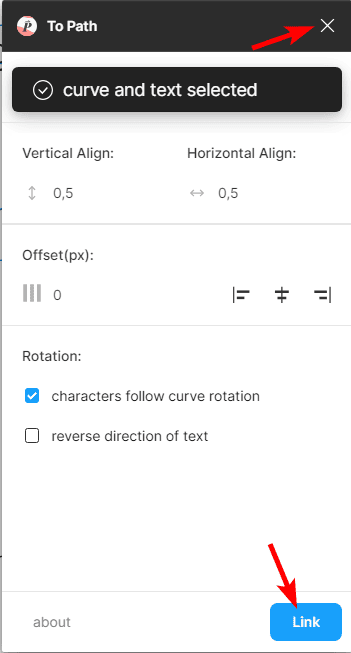
Once you have adjusted the settings, click the Link button at the bottom to create a copy of the text on the path.
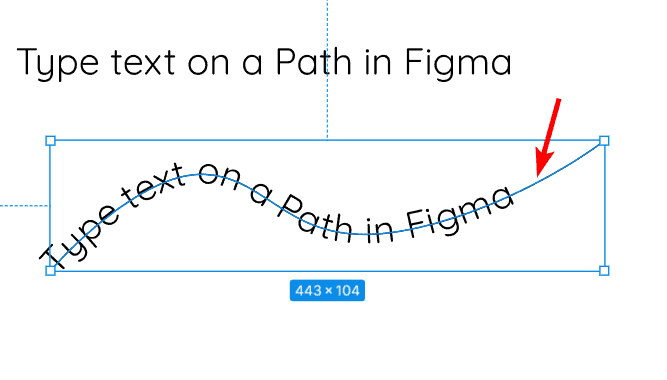
Once the two are linked, you can see the effect on the canvas. Move the plugin window and adjust the settings further if needed. Close the plugin window when you’re happy with how the text sits on the path.
Select the Path
Once you have linked the text and the path, you will notice a copy of the text is made to be placed on the path. You can now edit the path to remove the stroke if you don’t want the path visible.
To edit the path, select it by double-clicking on the path. Ensure that the text isn’t selected.
Change the Stroke Color to Transparent
With the path selected, you can change the stroke color to transparent. Click the swatch underneath the Stroke options in the right-hand panel to change the stroke color. Then move the transparency slider to fully transparent.
Check the Canvas
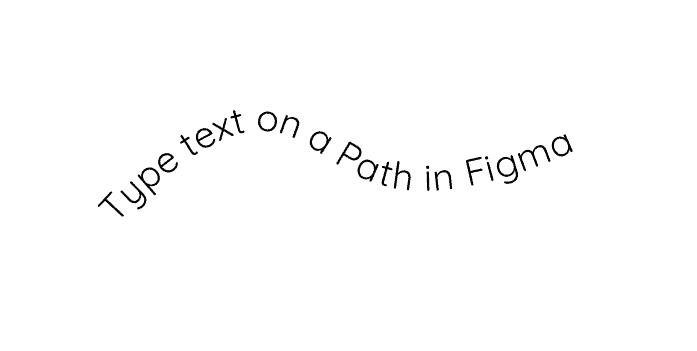
You will now have your text on a path without the path being visible. This allows the text to curve and follow the path you created without a distracting line through it. You can select the letters individually to edit the font or color as needed.
Tools:
- Figma