

Illustrator is an excellent tool for creating vector illustrations and designs. You can also use it to send artwork to printers if you don’t have access to InDesign. When using Illustrator, there are two types of outlines that you may come across.
You can convert your text to outlines, which preserves the font in case another device doesn’t have the font installed, and you can view your document in outline mode, which only shows the outlines of your designs without any color or added effects.
It can be tricky to navigate whichever outline mode you are using, whether you accidentally converted your text to outlines or entered outline mode by accident. Here is how to reverse these actions and work on your project normally again.
Table of Contents
How to Undo Text Converted to Outlines
Converting text to outlines turns the text into a vector path, which means you can’t edit the text normally by typing extra words or deleting sections. You can only edit the letters as paths, which means you can manipulate the shapes or change the color.
Normal text is editable using the Type Tool, and you can see this editable text by the blue underlining.

Text that has been converted to outlines has a thin blue outline around each letter when selected.

You will need to convert text to outlines if you send the design to a device that doesn’t have the font(s) you used installed. In this case, it preserves the text and doesn’t alter it across devices.
However, the problem is that it’s not easy to undo the outlines unless you undo them right away. If you save and exit your document, you can't undo the outlines in the program, as there is no function to convert text back to its editable state. There are a few workarounds to help you if you saved and exited by accident.
Use the Undo Function
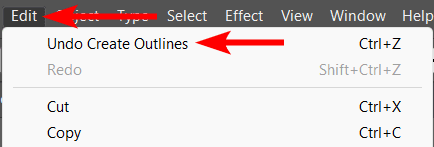
The first and best method to undo outlines is right after you have converted the text to outlines.
After converting the text to outlines, undo this by going to Edit > Undo Create Outlines or using the shortcut Control + Z on Windows or Command + Z on Mac. If you have done a few actions after converting the text, you may need to repeat this action a few times until you get to undo the conversion.
If you intentionally convert text to outlines, I recommend you save a copy of the document before you convert the text to be safe. You can always keep a separate copy with the text converted to outlines to send to clients.
Open a Previous Saved Version of Your Document
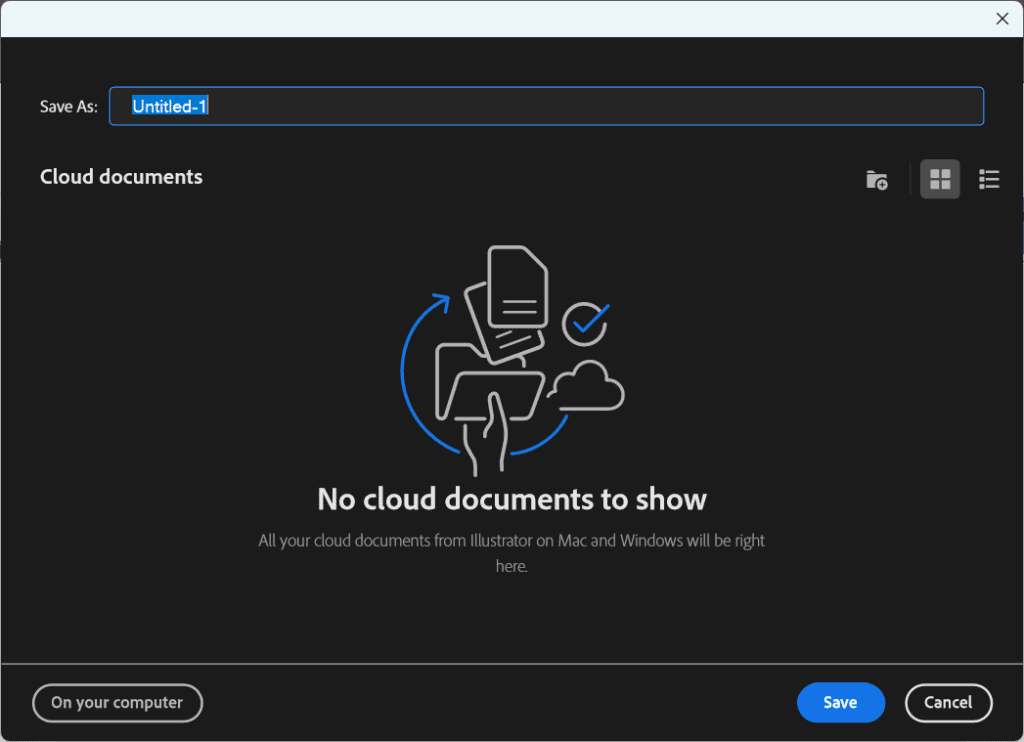
You can't use the undo function if you have already saved and exited your document. However, you can find a previously saved version of your work if you have been saving your work on the cloud.
To save your work in the cloud, select the cloud option whenever you are saving your work. This needs to be done before converting to outlines, so it’s good practice always to use this saving method.
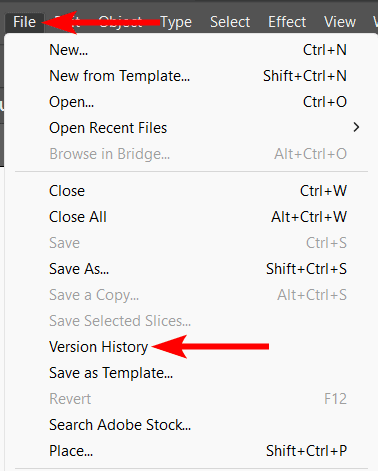
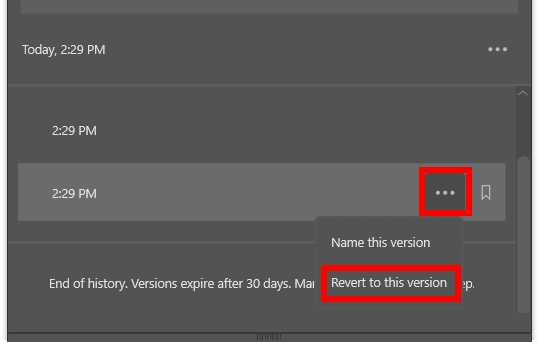
To access a version previously saved in the cloud, go to File > Version History.
You will then see a list of the times you saved the document.
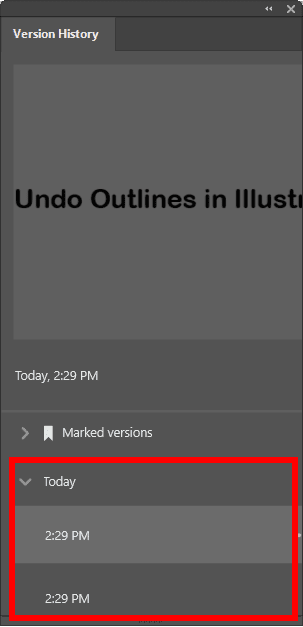
Click on the three dots next to the one that was saved before you created the outlines, and select Revert to this version. The document will open at the point you saved it. Remember, you’ll lose any other edits you made after the file was saved.
Save the File as a PDF and Copy the Text
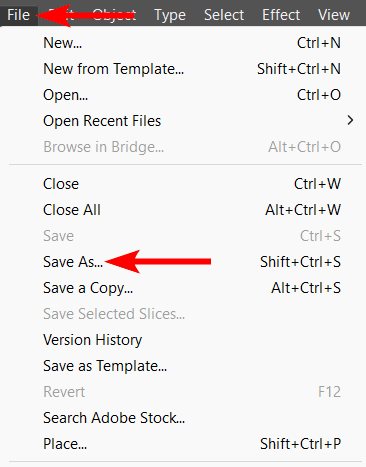
Another workaround is to copy the text from a PDF. This method is only available if you have a subscription to Adobe Acrobat Pro. To use this method, you first need to save the file as a PDF.
Save the file by going to File > Save As or using the shortcut Shift + Control + S on Windows or Shift + Command + S on Mac.
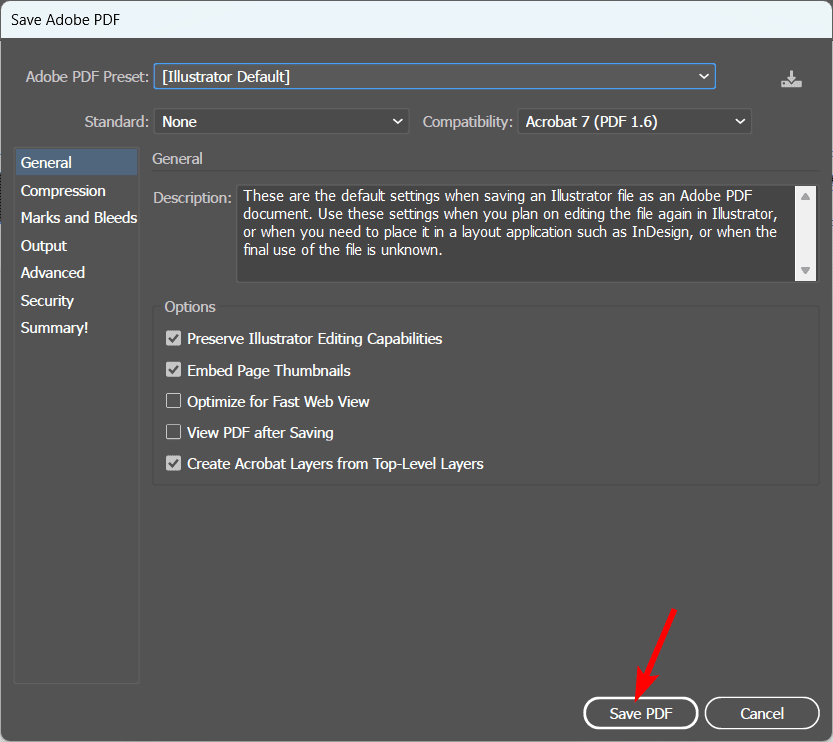
Then, select PDF under the Save as Type option and click Save.
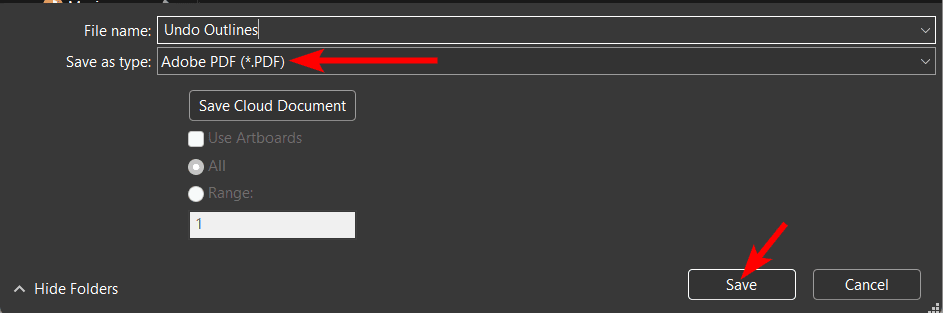
You can leave the settings as they are in the window that appears and click Save PDF.
Then, open your file in Adobe Acrobat Pro and click Edit PDF from the options on the right.
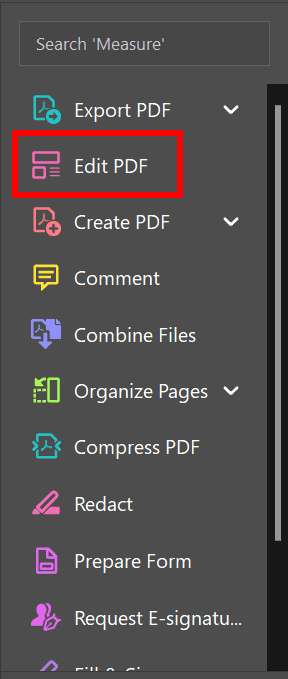
You can then use the PDF’s editing capabilities to Recognize the text, which converts it from a vector to an editable text, and then you can select and copy the text using Control + C on Windows or Command + C on Mac. You can then paste the text into your document in Illustrator to replace the outlined text.
How to Exit Ouline Mode in Illustrator
The other form of outlines you may come across in Illustrator is the Outline mode, which temporarily converts the elements on your canvas to outlines. This simplified view allows you to edit and create elements more easily without colors and added effects getting in the way, especially if you have a lot of overlapping shapes.
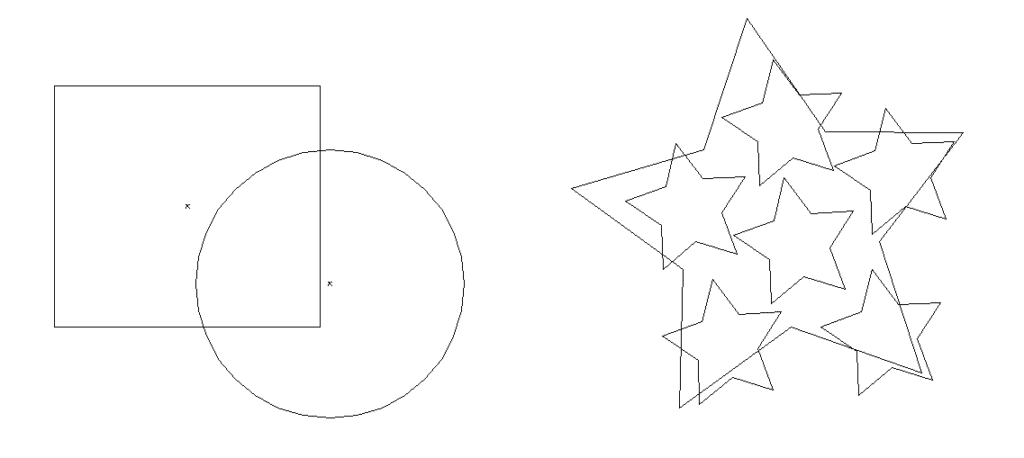
The outline mode takes a document that looks like this in normal mode, which is known as CPU mode:

And removes the colors to only show the outlines, like this:
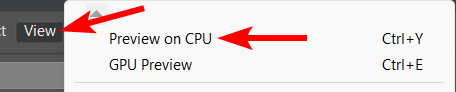
While this mode is useful for editing in some instances, it can be frustrating if you accidentally activate it or can’t get out of it. Luckily exiting this mode is easy. You can exit outline mode by going to View > Preview on CPU or use the shortcut Control + Y on Windows or Command + Y on Mac.
👍 Support Us: Subscribe to our channel and help us continue providing these tutorials.
🌟 Regular Updates: We publish how-to videos for Adobe Illustrator regularly!
🔧 Expert Guidance: Learn Illustrator from our professionals and uncover exclusive tips!
