
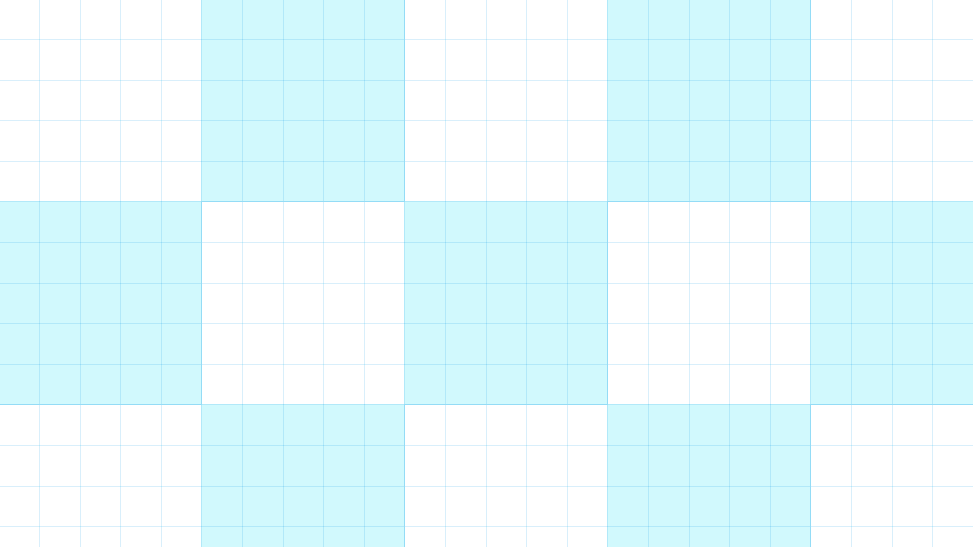
Before you turn on snapping and use the function, you need something on your canvas to snap to. You can have any object or element. I will be using a temporary guideline grid I added. This allows me to snap the new objects to the grid to help me measure and align the objects in my layout.
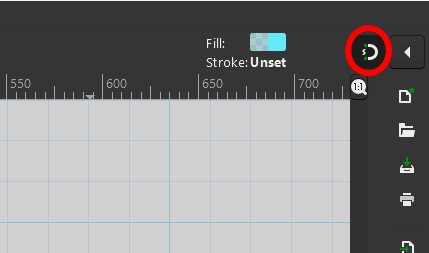
Once you have your first object on the page, you can turn on the snapping function. Previously, you would need to go to File > Document Properties and locate it under the Snap tab. However, in the latest versions (currently V1.2.2), you can find the option at the top right-hand side of the page. Click on the arrow next to the S and the magnetic icon.
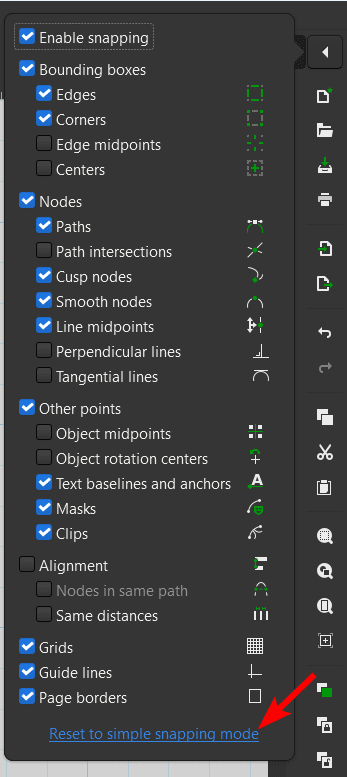
When the tab pops open, click the box next to Enable snapping.
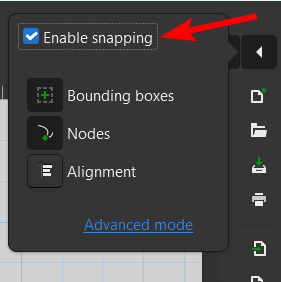
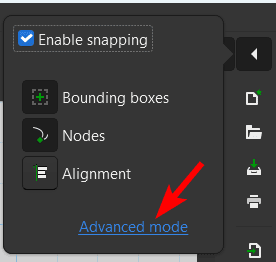
You can then choose what you want your object to snap to by turning the various elements on and off. First, click on Advanced Mode at the bottom of the tab.
Then, you can check the boxes next to all the elements you want your object to snap to. To revert to the basic snapping options, click Reset to simple snapping mode at the bottom of the tab.
However, all the options checked in the advanced mode will be active when you turn on snapping. Since the Guides were checked, my objects will snap to the guides on the page.
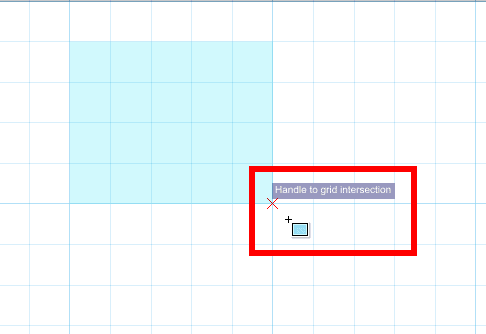
Once snapping is enabled, you can hover your mouse close to the guideline or object, and you will notice an X icon appear on the nearest snapping point, along with a description of where your object will snap.
You can then click and drag to create your object. When dragging, the object will snap to other areas as you near the elements. You can pull it past the snap until you are happy with your object's placement.
You can now create measured and aligned elements for your design or artwork.
You can toggle the Snapping function on and off using the icon showing the magnet with an S inside it.
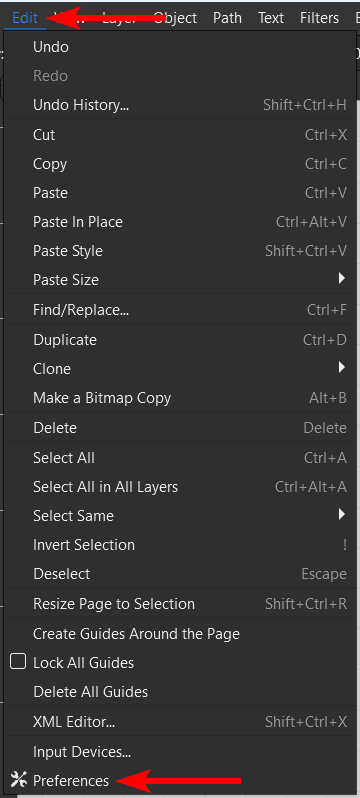
To customize how the snapping tools work, access the properties by going to Edit > Preferences.
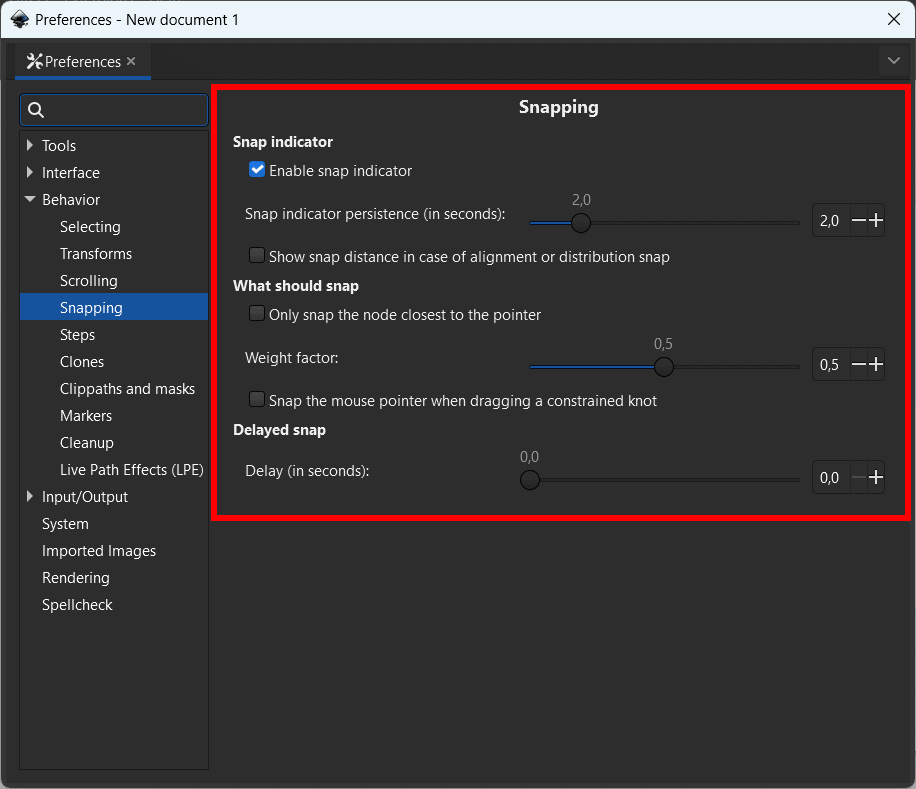
Open the Behavior tab and click on the Snapping tab option.
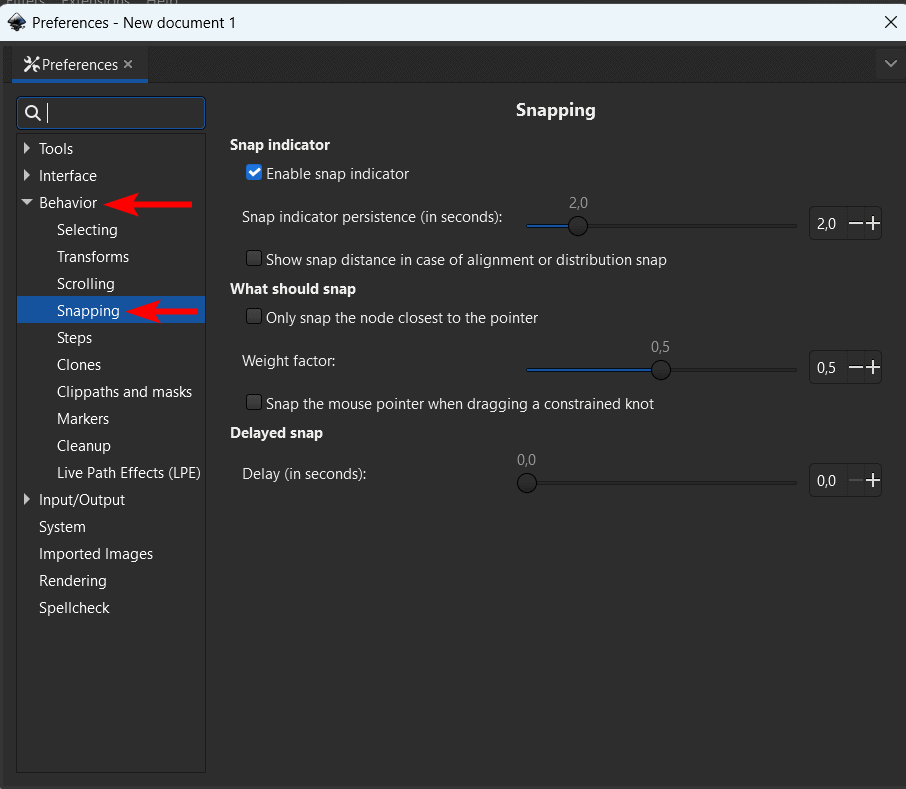
You can then adjust the various properties in the middle of the panel to adjust the snapping function to your needs.
👍 Support Us: Subscribe to our channel and help us continue providing these tutorials.
🌟 Regular Updates: We publish how-to videos for Inkscape regularly!
🔧 Expert Guidance: Learn Inkscape from our professionals and uncover exclusive tips!
