

While it’s not often that you’ll work with images in Adobe Illustrator, there are times when you need to manipulate photos for your project. One instance is when you want to wrap an image around an object. There are various ways to wrap an image in Illustrator, but one of my favorites is the Envelope Distort function.
Using this method, you can manually wrap an image around an object with the mesh function, or you can quickly wrap an image using an object, such as a shape. The key to warping an image is to rasterize it first, which I will show you how to do, and then wrap the photo in two different ways.
Table of Contents
Overview to Wrap an Image Around an Object in Adobe Illustrator
- Add the image to your canvas
- Rasterize the photo by clicking on Object > Rasterize
- Add the object or shape to the canvas
- Enter the warp mode by going to Object > Envelope Distort
- Select either Make with Mesh or Make with Top Object
All Steps in Detail

There are a few ways to wrap an image around an object, and one top method is the Envelope Distort function. This method lets you choose between manually wrapping the image using a mesh or automatically wrapping a photo into a set object.
I will show you both methods by detailing the manual and automatic wrapping methods. These two methods give you a choice between customization using the first method or speed using the second method.
Total Time: 10 minutes
Rasterize the Image Layer
To warp an image in Illustrator, you must first rasterize the layer. This step converts the image to pixels, allowing you to edit the photo as you would in Photoshop. You can distort and manipulate the pixels more than when the image is a vector.
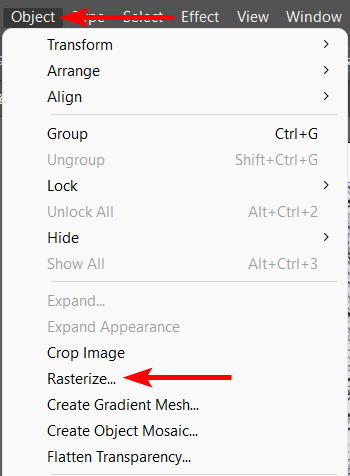
To rasterize the image, select it and go to the menu clicking on Object > Rasterize.
Change the Rasterize Settings
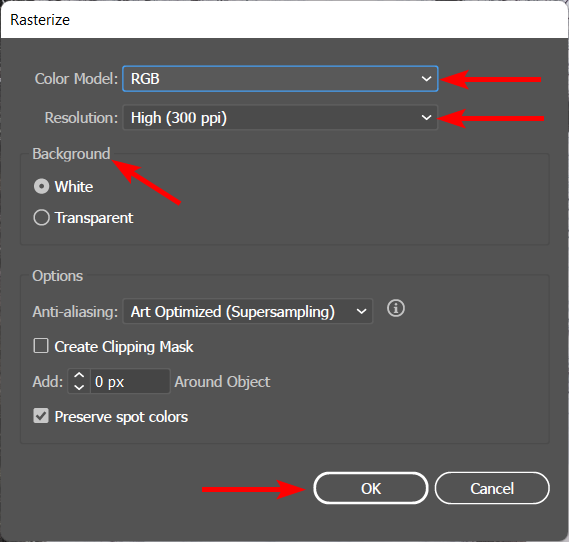
When the Rasterize window opens, you can alter a few settings if needed. You can change the Color Mode and the Resolution. You can select a white or transparent background if you are working with an image that has transparent areas. Leave the bottom options as they are.
Click OK when you have changed the settings.
Add the Object to the Canvas
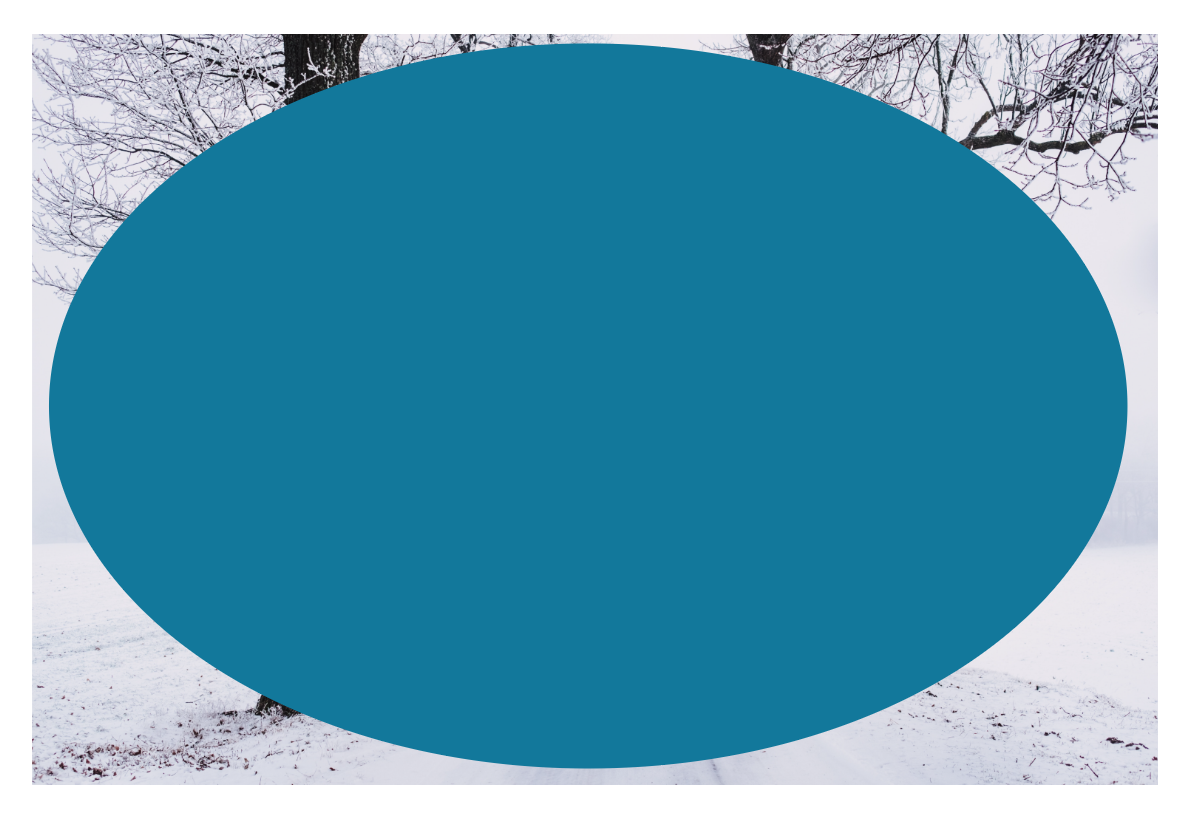
Add the object you want to wrap the image around to the canvas. This can be a shape you create in Illustrator.
Method 1: Wrap the Image Around the Object Manually

If you want to wrap the image around manually, bring it in front of the object by selecting it, then press Shift + Control + ] on Windows or Shift + Command + ] on Mac.
Activate the Envelope Distort Function with Mesh
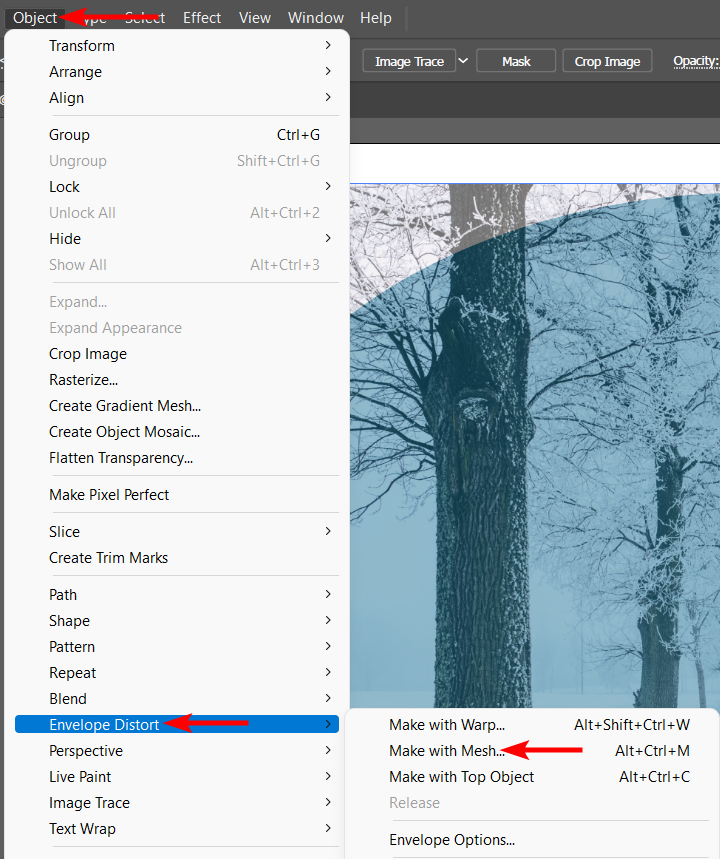
Next, select the Envelope Distort feature, but choose to Make with Mesh. You can find this option by following the menu path Object > Envelope Distort > Make with Mesh. Or use the shortcuts Alt + Control + M on Windows or Option + Command + M on Mac.
Set the Envelope Distort Mesh Settings
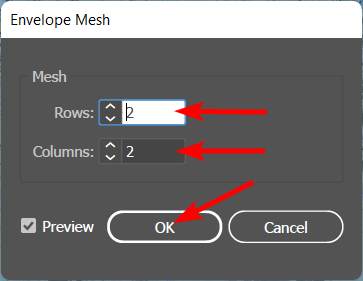
When the Envelope Mesh box appears, you can set the number of rows and columns the mesh will have. The more rows and columns you add, the more control you have over the warp. A larger mesh also lets you isolate areas to warp.
When wrapping an image around an object, you don’t want to isolate areas too much. Since I am wrapping the image around an oval, I only need 2 rows and 2 columns.
Reduce the Opacity of the Image
Now, reduce the opacity of the image by selecting the image and then using the Opacity slider in the top settings bar. This step allows you to see the shape through the photo, making the wrapping much more effortless.
Warp the Mesh Using the Outside Anchor Points
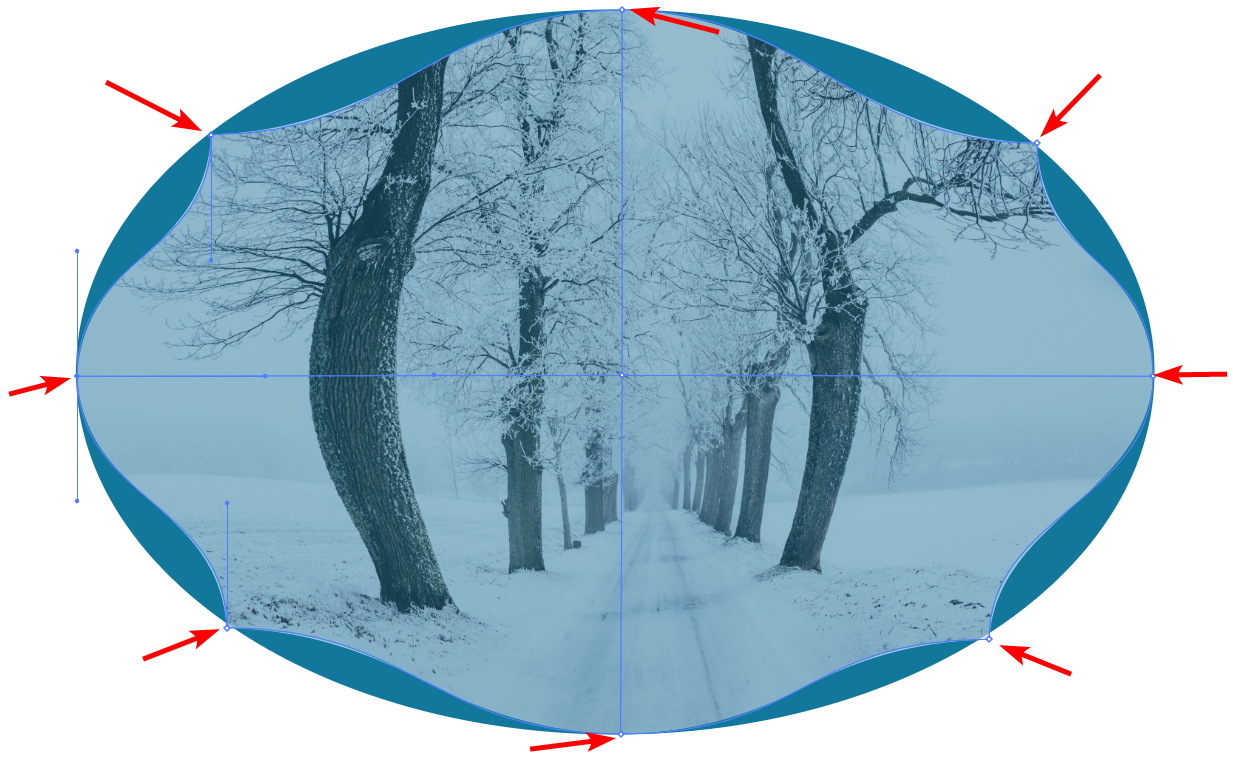
The mesh now has anchor points around the edges that you can select with the Direct Selection Tool (A). Click on a side anchor point once to select it, then click it again, drag it down toward the oval (or object), and match it up with your object.
Repeat this with all the outer anchor points on the image.
Warp the Mesh Using the Control Points
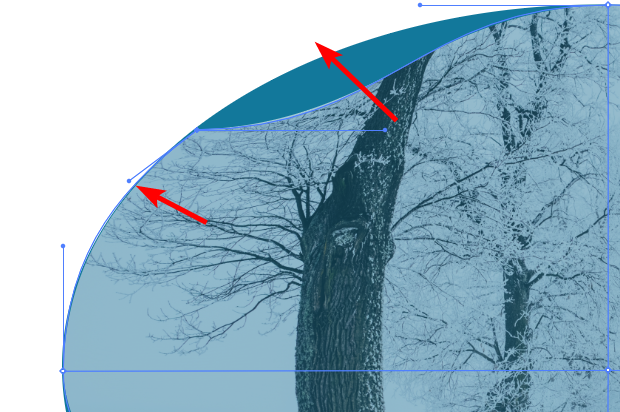
Bringing the outer anchor points inward doesn’t completely wrap the image around the object, and this is because you need to move the control points as well. When you click on an anchor point to select it, you will notice two lines appear next to it, with a dot at the end of each one. These are the control points.
Click on a control point and move it around to line the image up with the object. Then repeat with the second control point.
Complete the Outer Warp Using the Control Points

Repeat the step above on all the outer control points to line the image up with the object correctly.
Increase the Opacity of the Image

You can now increase the Opacity of the image using the same slider in the top settings bar to bring back the image details and hide the shape layer. You can delete the shape layer if you’d like, as you don’t need it anymore.
This method gives you more control, especially when wrapping an image around a more complex object.
Method 2: Wrap the Image Around the Object Automatically
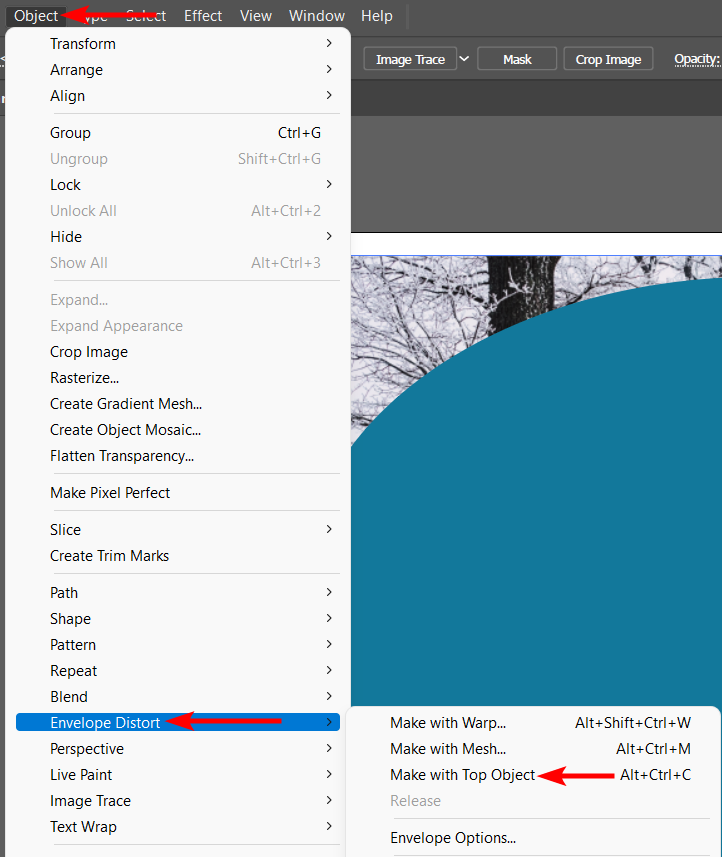
If you want a faster way of wrapping the image without needing control, you can use a much quicker method. Follow the steps up to adding the object onto the canvas. Leave the object on top of the image and make the Envelope Distort using the top object. Ensure that both the image and the object are selected.
To use this method, follow the menu path of Object > Envelope Distort > Make with Top Object. You can also use the shortcuts Alt + Control + C on Windows or Option + Command + C on Mac.
Check the Final Warp
After a few moments, Illustrator automatically wraps the image around the object. This is a much faster way, but you can’t control the warp as much.
Tools:
- Adobe Illustrator
👍 Support Us: Subscribe to our channel and help us continue providing these tutorials.
🌟 Regular Updates: We publish how-to videos for Adobe Illustrator regularly!
🔧 Expert Guidance: Learn Illustrator from our professionals and uncover exclusive tips!
