FireAlpaca is a user-friendly editing software program that lets users create stunning images without unnecessary hassles.
Various features can be useful to everyone – both experienced and beginner users. Some of its features include customizable text boxes, effects, and backgrounds that can be extremely useful for photo processing.
It is also possible to use the software’s stickers to highlight pictures on your walls or desks.
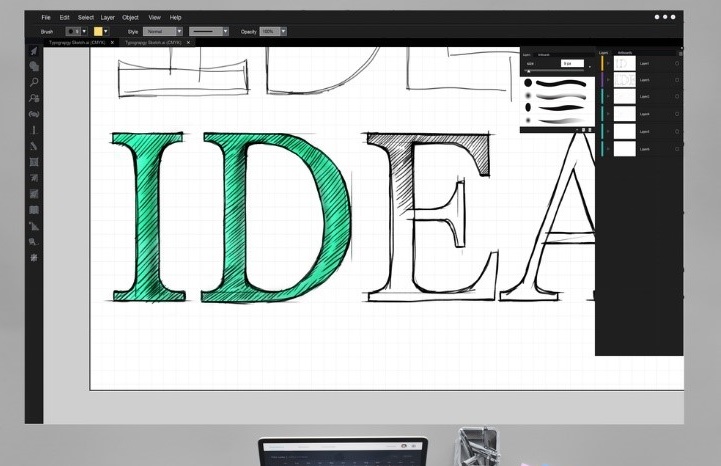
Not only does FireAlpaca let you create illustrations and other designs, but you can also include text in your creation. Here is how to rotate text in FireAlpaca.
Table of Contents
How to FireAlpaca: Rotating Text in FireAlpaca
You can rotate just about anything in FireAlpaca, including text. To rotate a text, simply use any of these commands:
- Control + A or Command + A
- Control + C or Command + C
- Control + V or Command + V
Using any of the key combinations creates a new layer that can be rotated. You should note that your text needs to be finalized before using any of the commands to rotate it. This is because you will be unable to change it once it is completed.
You can rotate layers or items within a layer folder. The first thing you should do is select the areas you intend to rotate and drag the Transform box to rotate. You could also drag inside the box if you intend to move items. The corners can be dragged to resize the item, too.
While it might be surprising to some, you can actually add text in FireAlpaca and customize it just the way you want.
Another great thing about the software is that the text fonts you use in the application are the same as what your operating system uses, so there really is no need for any extra complex font installation process.
How to FireAlpaca: Customizing Font
As stated earlier, FireAlpaca uses system fonts, so you don’t have to get an independent font manager.
You can simply install your fonts on your computer the regular way. If your operating system is Windows, you can right-click on the .otf or .ttf files and install the fonts from the menu that pops up.
Installing fonts is quite easy. All you need to do is close any applications you plan to use the fonts in. Before this, though, you should have downloaded your font files, most likely in a .zip, .ttf, or .otf file formats.
Next, right-click the fonts you want to add and then select the “Open” option. Next, click “Install” to install the fonts you downloaded onto your system.
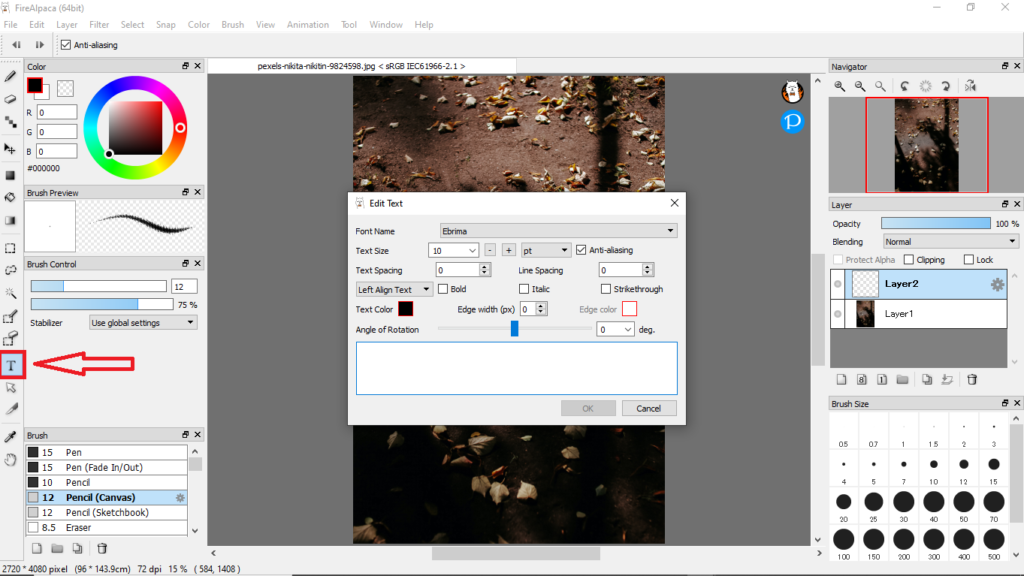
Once the installation is complete, the next step would be to actually create the text box in FireAlpaca.
This can be done by selecting the “T” icon on the left status bar. Selecting this icon opens up the text window where you can create your text using whatever font you want. Select your preferred font size, spacing, line spacing, alignment, and any other formatting option.
In the new window, there is a box for you to write your text. Once you are done, click the “OK” button to have the text added to your picture.
Keep in mind that the text box is typically applied on a different layer.
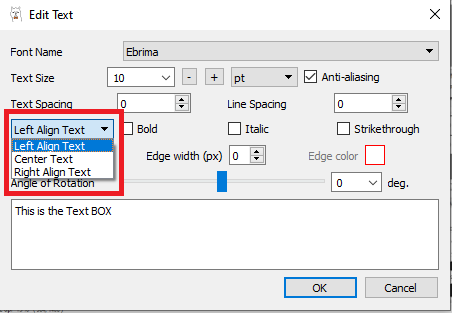
Is There a Way to Align Text in FireAlpaca?
After selecting your text font and format, you have the option to align your text in any way you want. You can choose what type of text alignment you want, including Left Align, Centre Align, and Right Align.
Once you have made your choice, click the “OK” button to apply the format to your text.
What Else Can You Do With a Text Layer?
It is possible to transform a text layer in FireAlpaca into a color layer when image editing.
Keep in mind that the text will always be included on a new layer, regardless of how many layers you already have in your project.
The text layers in FireAlpaca are editable. This means you can change the words, correct a typo, or even change the color and text font.
The most effective way to merge the text layer to another layer (usually below it) is to select the text layer, head to the Layer Menu, select Convert, and click Convert to Color Layer.
Is there a Way to Transform Mesh While Using FireAlpaca?
Yes, there is. To do this, you will need to select an area using the Select menu. Once done, select Mesh Transform in order to bring up the transformation grid.
Conclusion
FireAlpaca users have access to integral digital art tools such as the snap tool, move tool, hand tools, selection tools, eyedropper, buckets, symmetry brush, symmetry rotate tool, eraser, pencil, and, of course, the text tool to create just about anything one’s imagination can think of.
Rotating text provides an additional photo editing or customization layer to the inclusion of text in any project.
👍 Support Us: Subscribe to our channel and help us continue providing these tutorials.
🌟 Regular Updates: We publish how-to videos for FireAlpaca regularly!
🔧 Expert Guidance: Learn FireAlpaca from our professionals and uncover exclusive tips!