
Cropping images in InDesign is easy because of the way the program works with photos. The way pictures work in the program may be confusing to beginners or those unfamiliar with it.
Here, I will show you how images work in InDesign and how to easily crop an image for your layout.
If you simply need to crop an image without further edits, consider using our online image cropper as an alternative.
Table of Contents
Understanding the Image and Frame Elements in InDesign
Firstly, images don’t work the same as in other programs. For instance, if you open an image in Illustrator or Photoshop, the photo opens directly in the program, and you work directly on the picture.
In InDesign, to add an image to the document, you must place it in the project. The picture is placed inside a frame that acts as a holding container. Inside the container, the photo is set as a linked preview, meaning that you aren’t working with the actual picture but a copy shown by a preview.
As a result, when you work with an image, you have two elements to work with: the photo itself and the frame around it.
For example, I will show you how to crop using this white and black car on brown sand during daytime image from Unsplash.

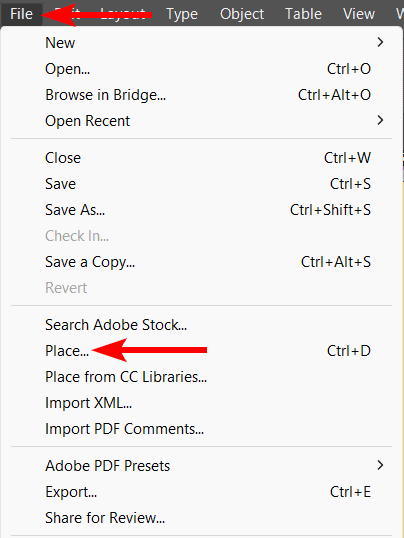
First, to add the image to the project, go to File > Place or use the shortcut Control + D on Windows or Command + D on Mac.
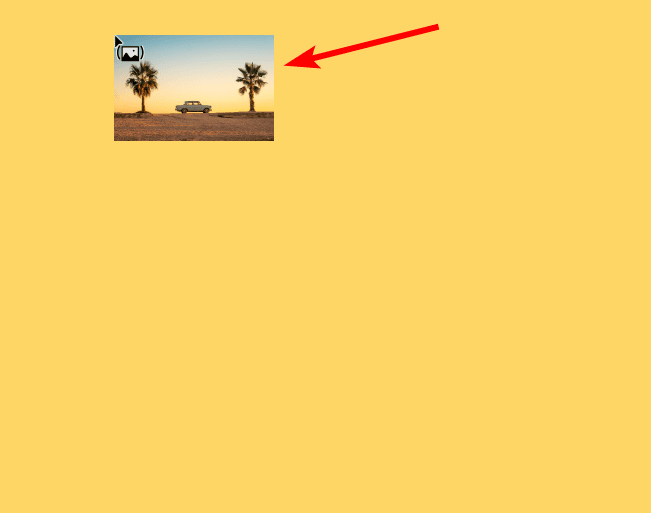
You can then select the image from your files. When you click Open in the Explorer or Finder window, you will see a thumbnail of the image where your mouse cursor is. The best way to add the image is to click where you want the top left corner of the image and drag the image out to size it how you want.
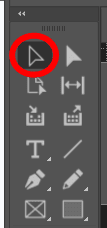
You now have the image and the container on the page. Activate the Selection Tool from the toolbar or by pressing V.
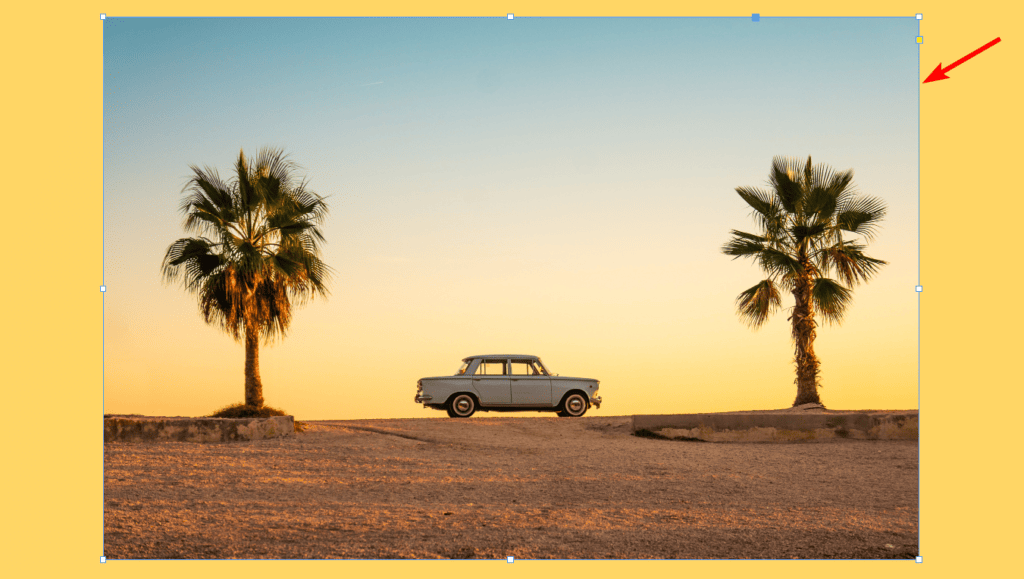
When you click on the image, you will see a blue box with control handles around the photo. This is the frame.
To select the photo, double-click on the image or hover the mouse in the center and click on the gray circle. You will see a brown box which is the image itself. In some cases, the image will extend past the frame, but that part of the image isn’t visible.
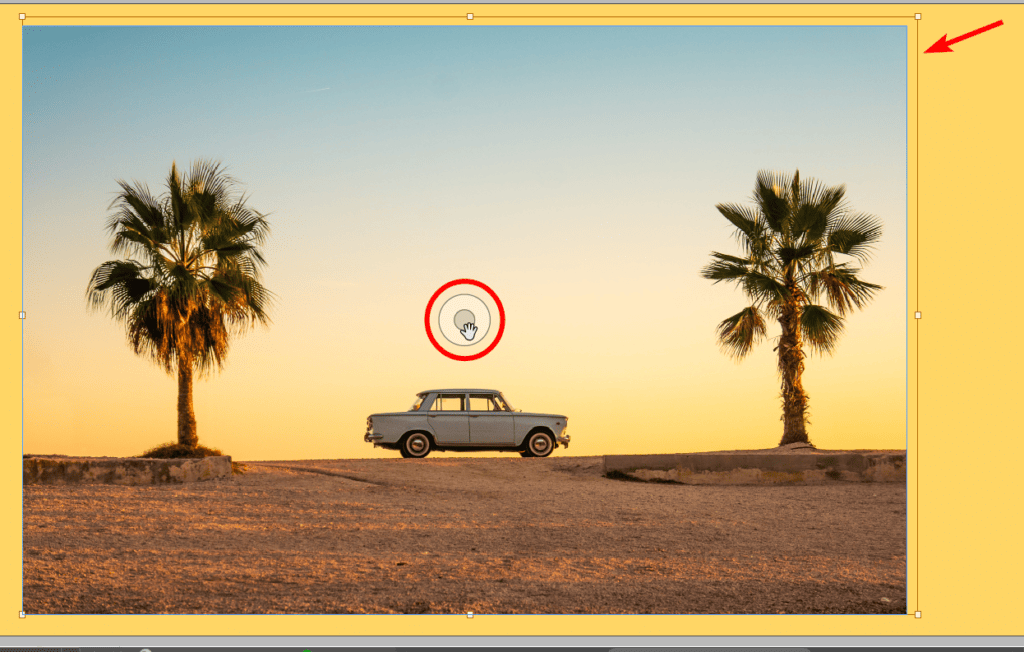
You can use the gray circle, known as the content grabber, to move the image around inside the frame. The two boxes allow you to edit the image and frame separately from each other when needed.
How to Crop an Image in InDesign
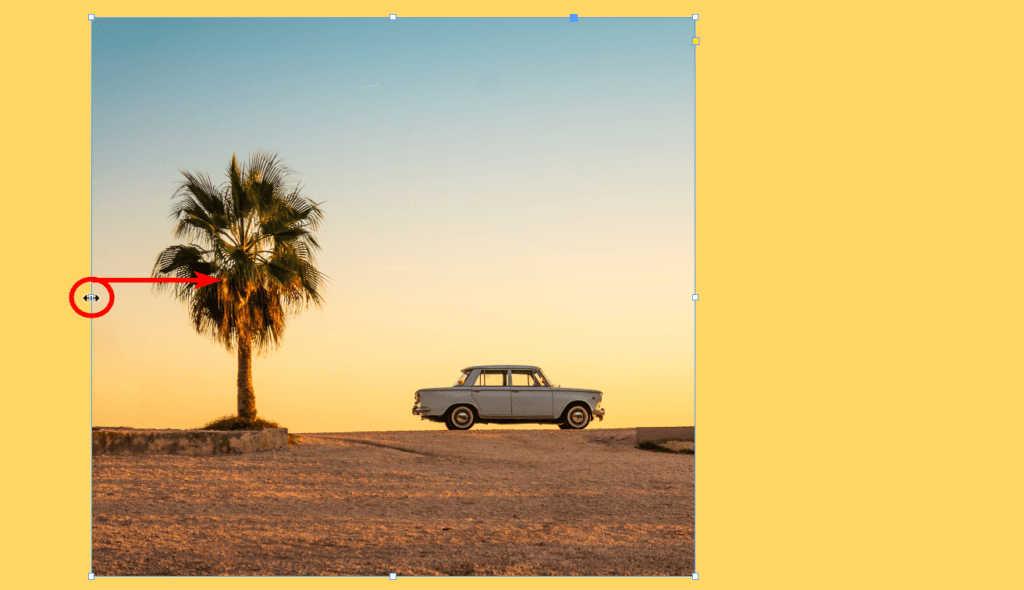
You can easily crop your photo once you understand how images work in InDesign. You need to work with the frame box to crop the image. First, activate the Selection Tool from the toolbar or press V.
Then, select the frame and not the image, so ensure that a blue box with control handles surrounds the image.
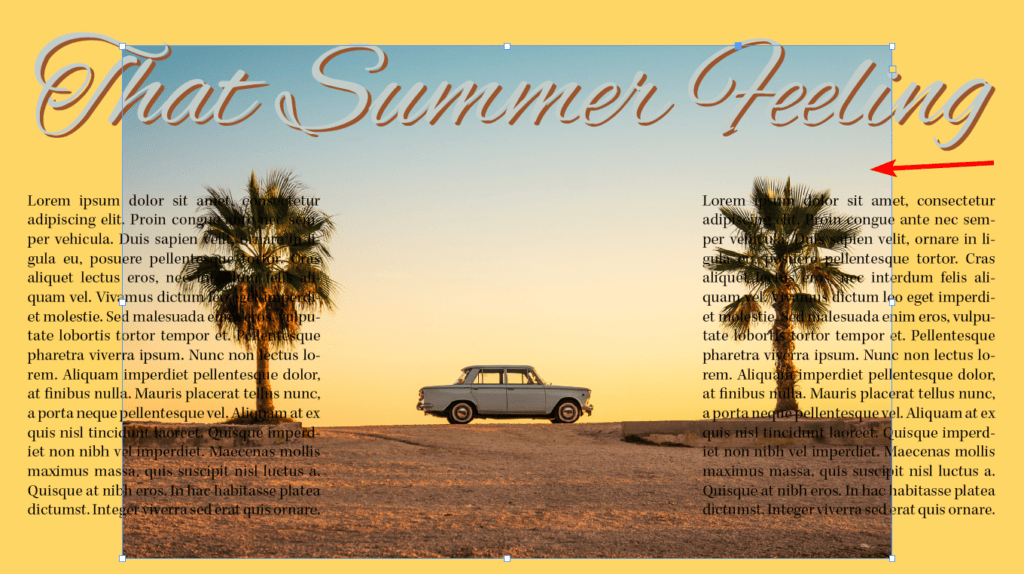
You can click on any control handle and drag it inward to crop the image. For example, I want to crop out the trees and turn the image into a portrait image. To do this, I click and drag the right handle inward and then do the same on the left handle.
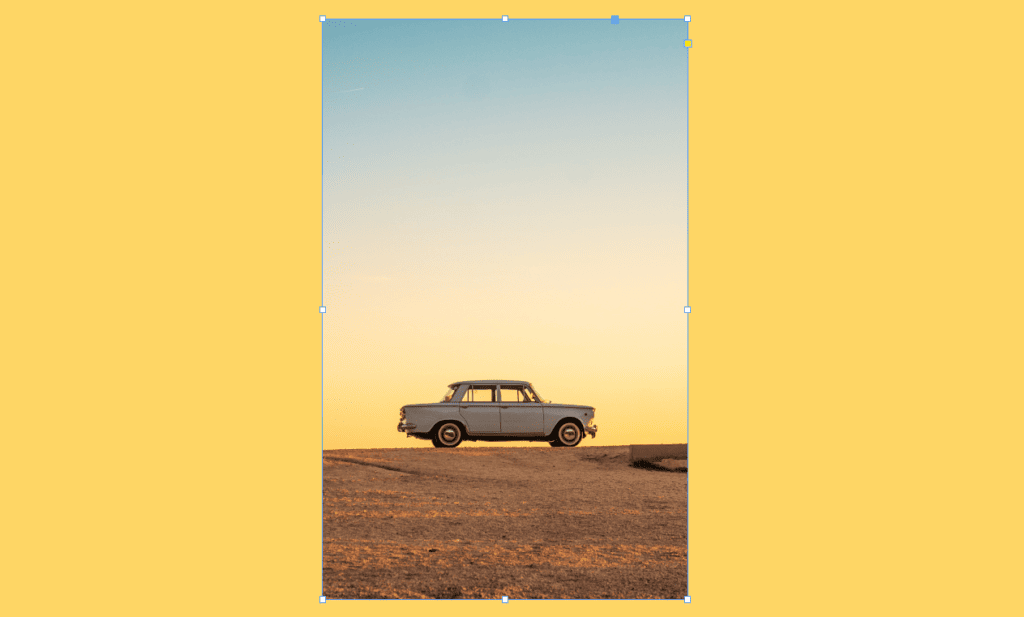
The image is now cropped, which means the rest of the image is hidden outside the frame. The content isn’t deleted, which means you can undo the crop at any stage.
Note: If you need to delete the cropped pixels to save space in your document, you will need to use another image editor.
How to Resize an Image and the Frame in InDesign
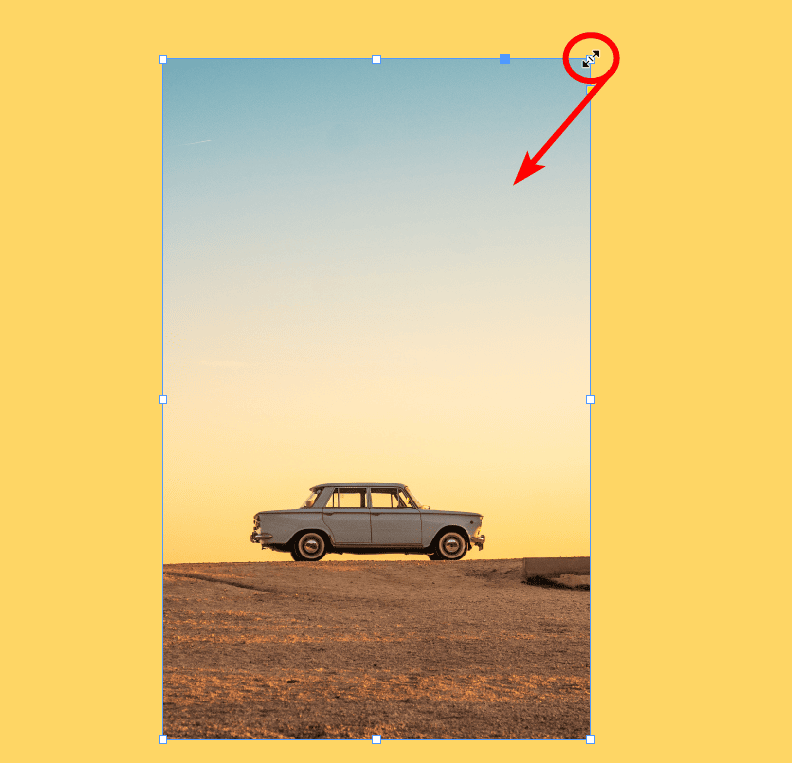
Once you have cropped the image, you may need to resize the photo as well as the frame. Since you don’t want to crop the image further, you must simultaneously resize the frame and image box.
Select the frame box (the blue bounding box with anchors) to resize the image and the frame together. Then, hold in Shift + Control on Windows and Shift + Command on Mac while you click an anchor point and drag it inward to make the image smaller or outward to enlarge it.
Holding these two keys ensures you resize the image and frame and keeps the proportions the same so the photo doesn’t stretch and warp.
You can now complete your design around the cropped and resized image.

How to Reset the Crop in InDesign
If you change your mind and want to remove the crop from the image, you can quickly set the frame to show all the content again.
First, select the frame and then go to Object > Fitting > Fit Frame to Content. You can also use the shortcut Control + Alt + C on Windows or Command + Option + C on Mac.
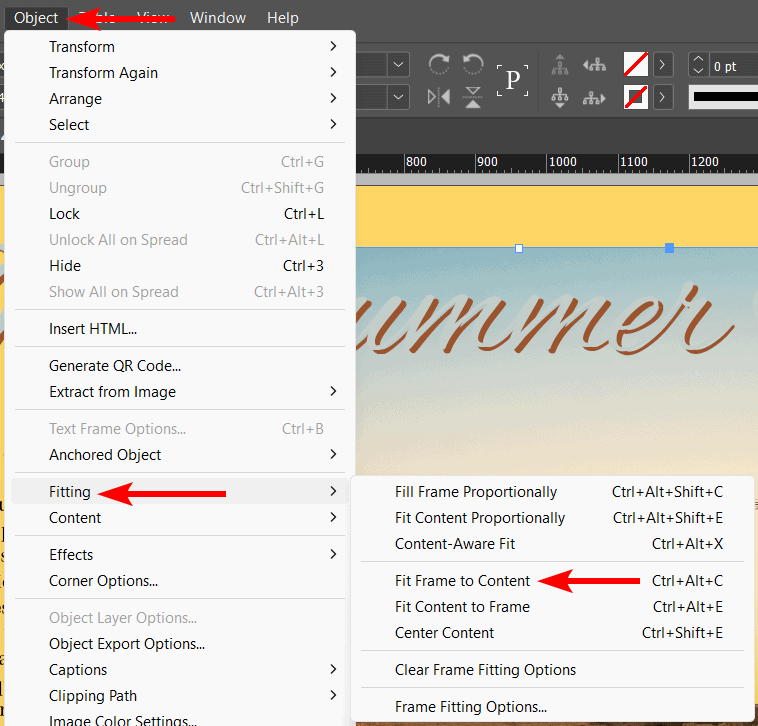
The frame will then expand to show the entire image again.
How to Crop the Image to a Shape
Another cool trick in InDesign is to crop the image frame into a shape to create a unique layout. To do this, select the frame and not the image.

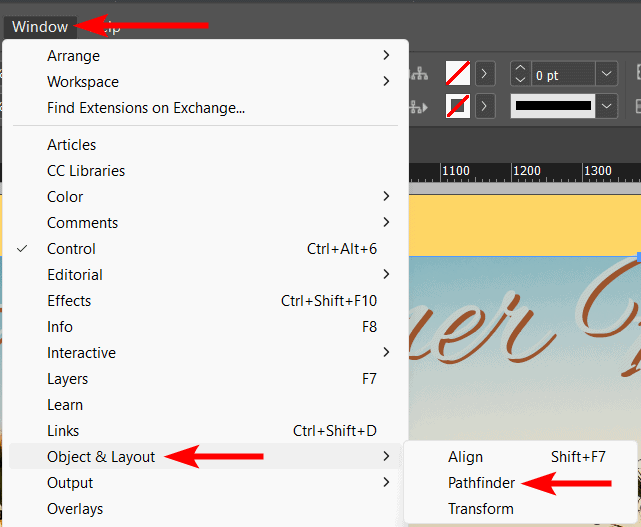
Then, open the Pathfinder panel. If you can’t see the panel, go to Window > Object & Layout > Pathfinder.
In the Pathfinder panel, select one of the shapes under Convert Shape.
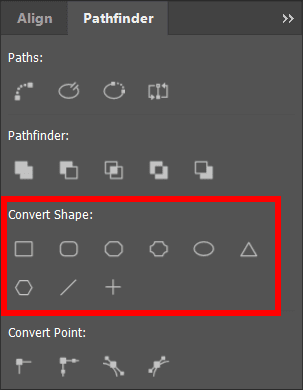
For instance, if I click on the Triangle, my image is cropped into a Triangle shape since the frame is converted to that shape.

You can now complete your design around the newly cropped image.

👍 Support Us: Subscribe to our channel and help us continue providing these tutorials.
🌟 Regular Updates: We publish how-to videos for InDesign regularly!
🔧 Expert Guidance: Learn Krita from our professionals and uncover exclusive tips!