It’s straightforward to round the corners in Adobe InDesign, and you can achieve the rounded corner look in different ways. You can round the corner of almost any shape or path you create, including stars you make with the polygon tool or custom shapes using the Pen Tool. You can also round the corners of images using the same techniques.
When rounding the corners of custom shapes or polygonal shapes, the technique differs from rounding the corners of a standard rectangle or square. Here are my top 4 ways to round the corners of any shape.
Table of Contents
Option 1: Use the Yellow Handle on the Rectangle
The first method to round corners in InDesign is the most straightforward, but it only works when rounding the corners on a rectangle or square. You can round the corners while seeing the change in real-time to adjust it exactly how you want it.
You must use one of the other methods if you have drawn a custom shape using the Pen Tool or drawn a polygonal shape.
To round the corners, draw the rectangle or square on the canvas. The edges are sharp by default.

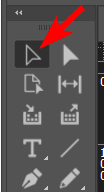
Then, activate the Selection Tool from the toolbar or press V.
Click on the rectangle with the tool, which brings up the transform handles around the shape.
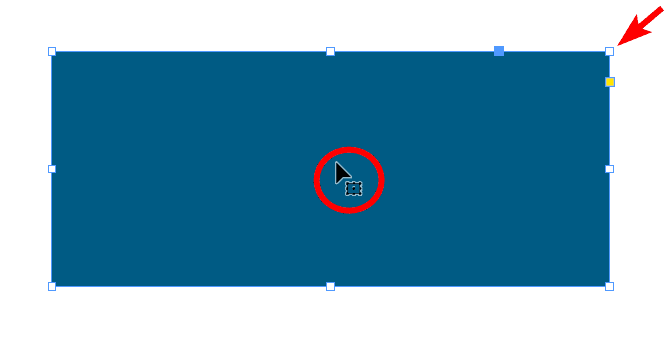
The eight main control handles are white, but you will see one blue handle and a yellow square. The yellow square controls the corners and how sharp or rounded they are. Click on the yellow square, and you will see yellow handles on each corner of the shape.
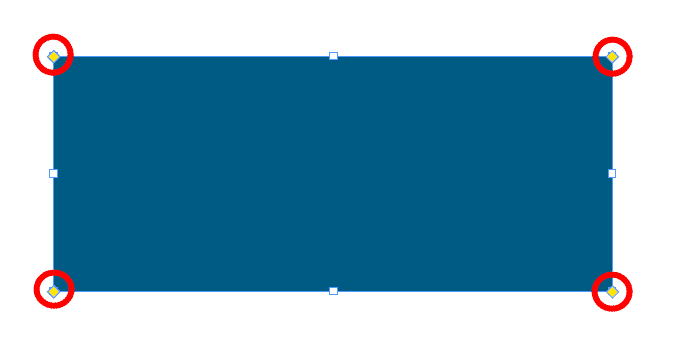
You can then click on any yellow handle and drag it inward on the shape. The further you pull it, the more rounded the corners will be. All the corners will be rounded together at the same amount.
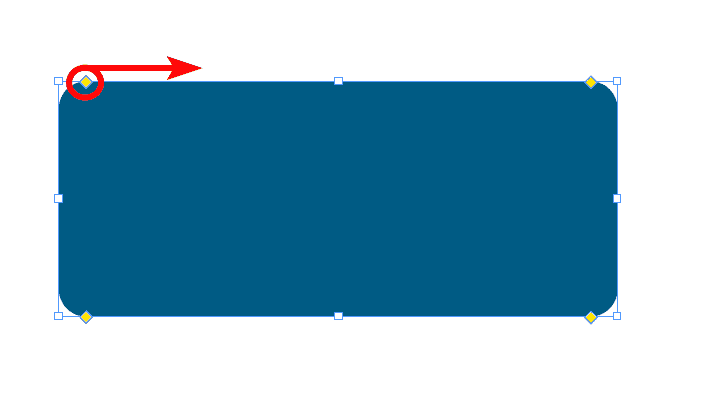
If you only want to round one corner without affecting the rest, hold in Shift while clicking on the corner handle and dragging it inward. Only the selected corner will be affected, and the rest will stay sharp. You can use this to round the corners to different degrees.

Option 2: Use the Top Settings Bar
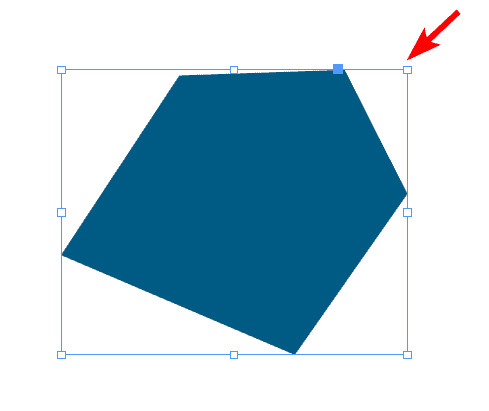
The second method uses the options in the top settings bar, allowing you to set a specific curve amount to round the corners. This option works on rectangles, squares, polygonal shapes, and custom shapes drawn with the Pen Tool. However, you can’t round individual corners with this method.
To use this method, draw the shape on the canvas, then select it using the Selection Tool (V).
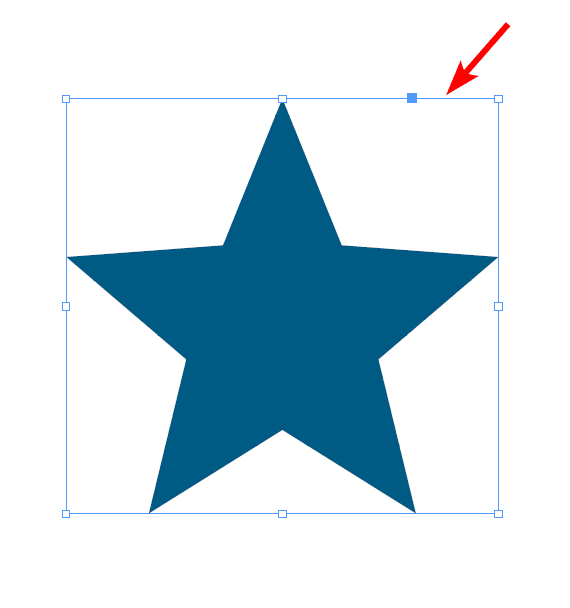
Then, find the corner settings in the top bar, which has a pixel amount and a drop-down menu below it. Click on the drop-down menu and select a corner type, which in this case, is the rounded option.
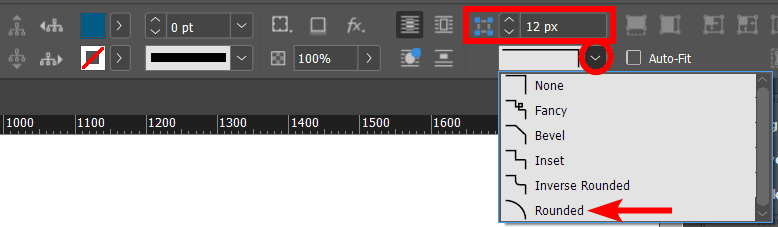
You can then adjust the pixel amount to increase the amount the corners are rounded.
You now have rounded corners on your shape.

Option 3: Use the Properties Panel
Using the Properties Panel is similar to the previous method and works on all types of shapes. You also can’t adjust one corner at a time using this method.
First, draw a shape on your canvas using the Pen Tool (P) if you want a custom shape. Then, select the shape using the Selection Tool (V).
Next, open the Properties Panel, which is located on the right-hand side of the workspace. If you don’t see the panel, open it by going to Window > Properties.
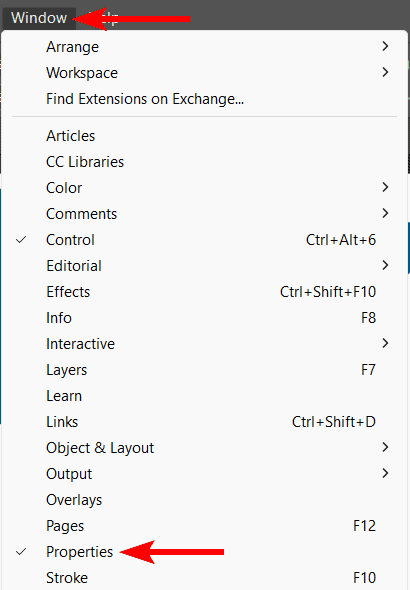
In the Properties panel, locate the corner settings and adjust them in the same manner as the previous option. Use the drop-down menu to select Rounded from the options, then add a pixel value to curve the corners to a certain degree.
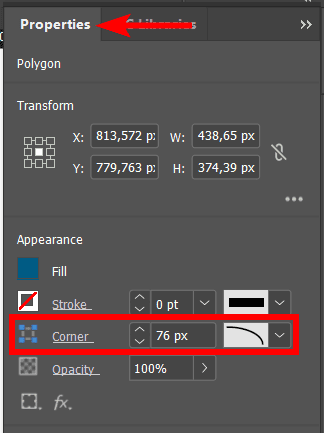
You now have a rounded custom shape on your canvas.

Option 4: Use the Object Menu Path
The last method works on any type of shape and allows you to adjust individual corners on rectangles and squares if you want. Unfortunately, you can't change individual corners if you have a polygonal or custom shape.
First, draw your shape on the canvas, and select it using the Selection Tool (V).

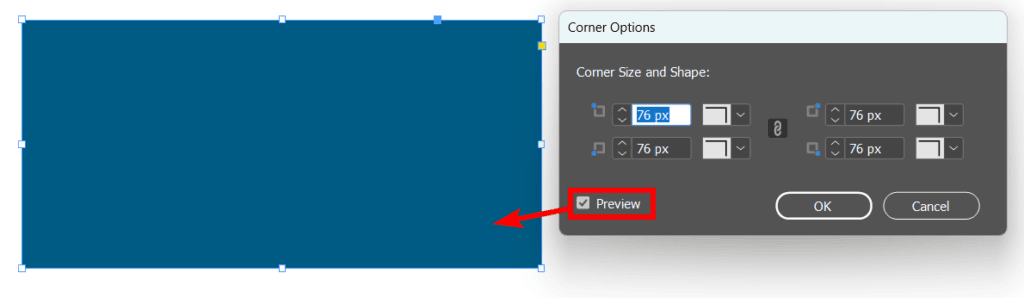
Once the shape is selected, go to Object > Corner Options.

In the corner options window, check the box next to Preview to see how the changes affect your shape.
You can then select the drop-down menu next to each corner, choose the type of corner you want, and adjust the pixel value to adjust how rounded each corner will be. If you want to change all the corners equally, ensure the Link icon is active in the center. Turn off the link icon if you want to adjust corners individually.
In my case, I turned off the link icon (the link has a line through when turned off) and only adjusted the top right and bottom left corners. Click OK when you have the corners set as you’d like.
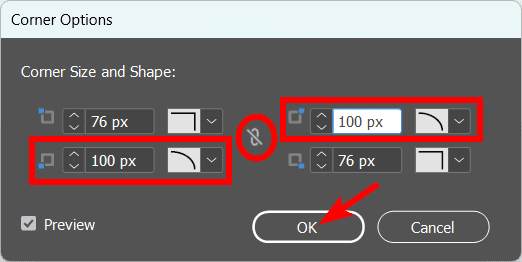
You now have a shape with individual corners rounded at the same pixel value.

👍 Support Us: Subscribe to our channel and help us continue providing these tutorials.
🌟 Regular Updates: We publish how-to videos for InDesign regularly!
🔧 Expert Guidance: Learn Krita from our professionals and uncover exclusive tips!