
InDesign is limited in certain editing aspects, and as a result, you can’t warp text in the same way you would when using Photoshop or Illustrator. You won’t have the usual arc, wave, and distort options. However, there is a customizable workaround.
Here I will show you how to use the Pen Tool to create a unique path and then add text onto the path in a curved or wavy shape to create the warped effect.
Table of Contents
Overview of How to Warp Text in InDesign
- Activate the Pen Tool (P)
- Add an anchor point on the canvas
- Click and drag to create a curved line
- Add as many anchor points as needed
- Select the Type on a Path Tool (Shift + T)
- Click on the path
- Type your text onto the curve
- Edit the text as needed
- Change the Stroke Color to transparent
- Check your canvas
Step-by-Step to Warp Text in InDesign

If you want to warp the text using the warp settings you find in Illustrator or Photoshop, I recommend you create the text in one of the programs, distort it, then save it as a PDF with a transparent background. You can then place the PDF into your InDesign document.
If you want to create your own warp effect, follow along to learn how to use the Pen Tool and create a path for your text.
Activate the Pen Tool (P)
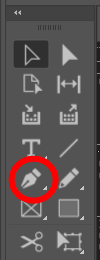
To start, activate the Pen Tool from the toolbar or press P.
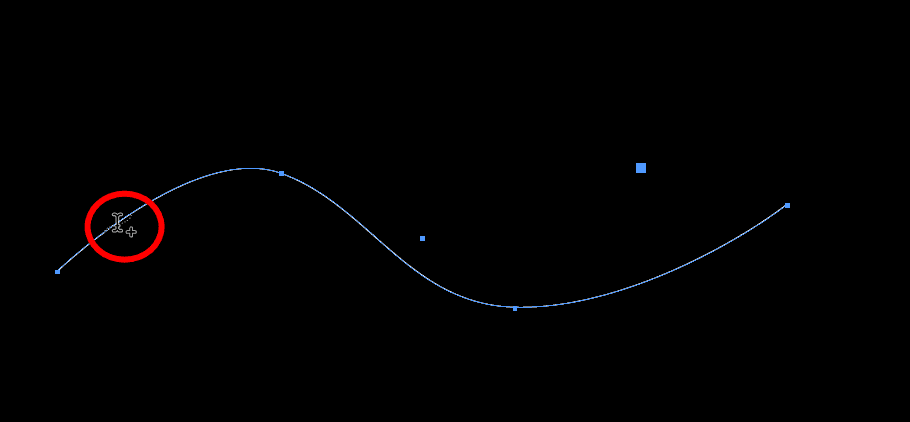
Add an Anchor Point on the Canvas
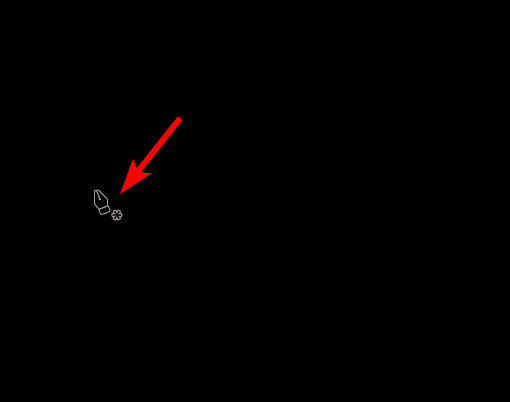
Once you have the tool active, you can start creating a path. To create a path, click once on the canvas to add the first anchor point.
Click and Drag to Create a Curved Line
Then, move the cursor to where you want the next anchor point and click and drag the line to create a curve. This curved line is the line your text will follow, so add the wave or arc you want.
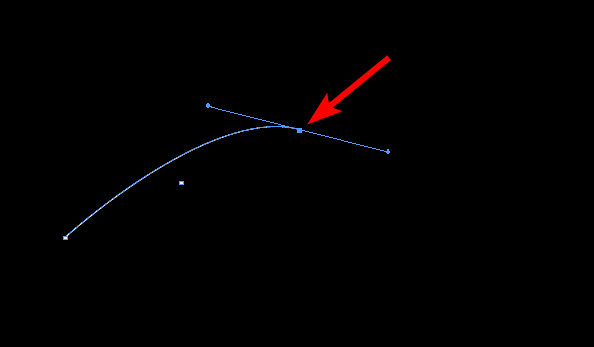
Add as Many Anchor Points as Needed

Continue clicking to add anchor points and dragging the point to create curved lines. Keep adding points to create the shape you want the text to follow. You can make the path as long or short as you wish.
Select the Type on a Path Tool (Shift + T)
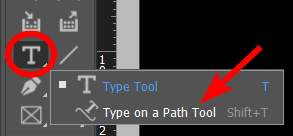
Now, you can prepare to add your text to the path to create the warped effect. First, activate the Type on a Path Tool by clicking and holding on the Type Tool in the toolbar until the menu pops up, or press Shift + T to activate it.
Click on the Path
Once the tool is active, click on the path to add text to the path. You will see the tool’s icon with a plus sign next to it to show that you will add text to the path.
Type Your Text Onto the Curve

You can now start typing to add your text to the curve.
Edit the Text as Needed
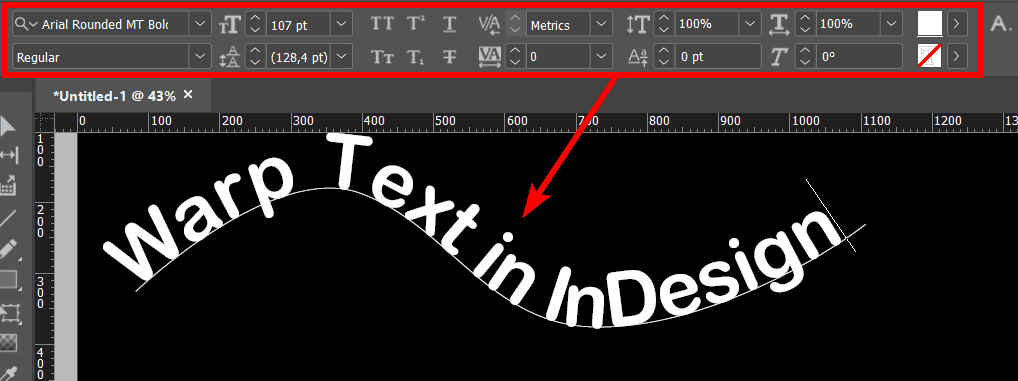
Once your text is added to the path, you can edit it as needed. You can change the text color, font, size, and other properties in the top settings bar.
Change the Stroke Color to Transparent
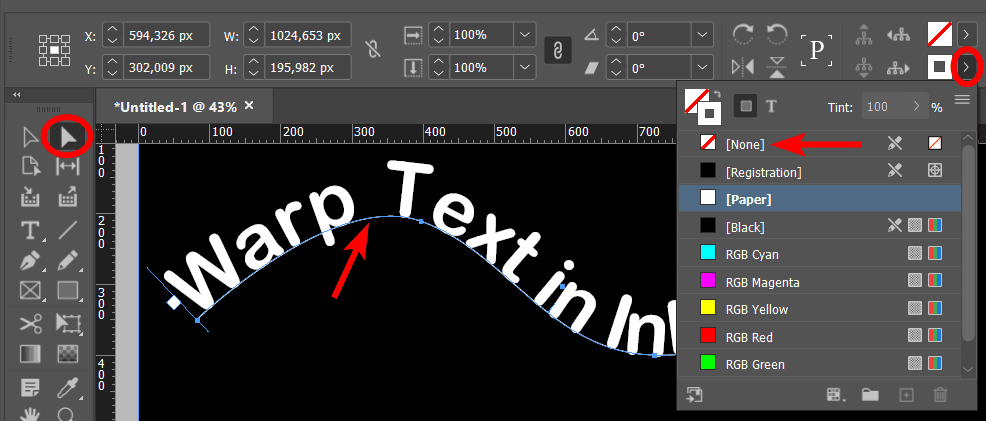
You will still have the path’s stroke line visible below the text. By default, this should be black or whatever color the stroke was set to before creating the path. I set mine to white to have it visible on the background.
To remove the stroke color, activate the Direct Selection Tool from the toolbar or press A. Then click on the path to select it. Next, open the Stroke drop-down menu from the top settings bar and select None.
Check Your Canvas
You will now have created warped text using a custom path to determine how the text looks on the canvas.
Tools:
- InDesign
Can You Use Shapes to Warp Text in InDesign?
Yes, instead of using a custom path, you can add a shape on the canvas and use the same process as above to type text onto the shape. This method helps to create text in an arc or circle.

How to Use Outlines to Warp Text Further
If you want to warp the text even further than possible using the path method, you can use outlines to convert the text to editable paths. However, once you convert the text, you won’t be able to edit it by changing the text font, size, and other properties.
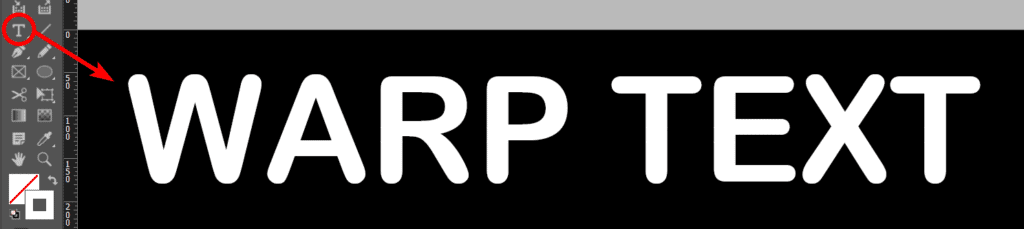
To warp the text using outlines, add your text to the canvas using the Type Tool (T). Make sure you format the text as you’d like since you won’t be able to do this later.
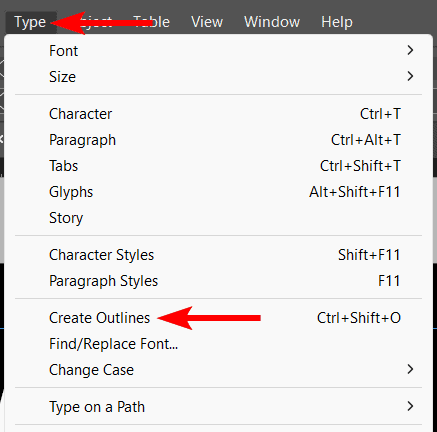
Once the text is on the canvas, select it using the Selection Tool (V). Then, go to Type > Create Outlines. You can also use the shortcut Shift + Control + O on Windows or Shift + Command + O on Mac.
Once the text is outlined, activate the Direct Selection Tool or press A and select the text. You will notice anchor points all around the text.
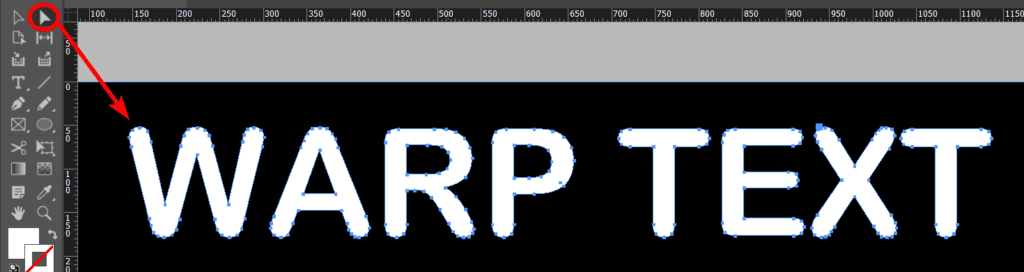
You can now use the Direct Selection Tool to click on an anchor point or select multiple anchor points by holding in Shift while clicking on them and dragging them to warp the text in various directions. Only the text near the anchor point will warp.

You can repeat this process to warp other anchor points on the text and create a unique warped effect.

👍 Support Us: Subscribe to our channel and help us continue providing these tutorials.
🌟 Regular Updates: We publish how-to videos for InDesign regularly!
🔧 Expert Guidance: Learn Krita from our professionals and uncover exclusive tips!