Simply put, bleed is the excess area on a design that allows for printing inconsistencies, such as a slightly skewed print. Here, I will delve into all the basics you need to know about this concept and how to add bleed to your InDesign documents.
The term can be confusing for many beginner designers or desktop publishers. However, it’s pretty simple once you know the basics.
Table of Contents
What Is Bleed?
Before you can add bleed to your projects, you need to know what this term means so that you can implement it correctly. Bleed is a concept only used in printed materials and not in any digital designs.
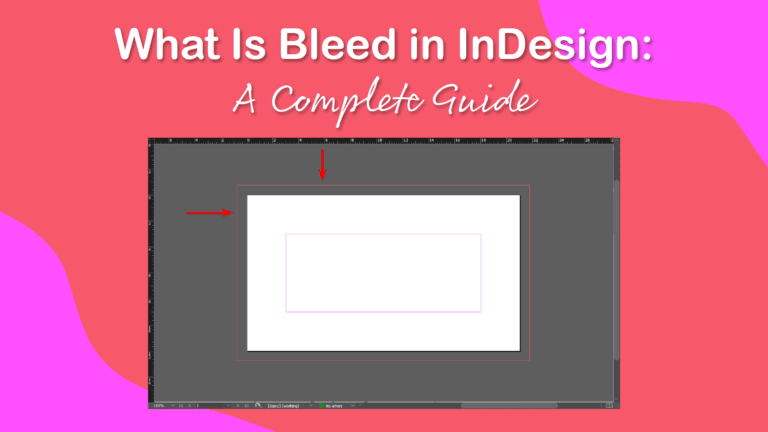
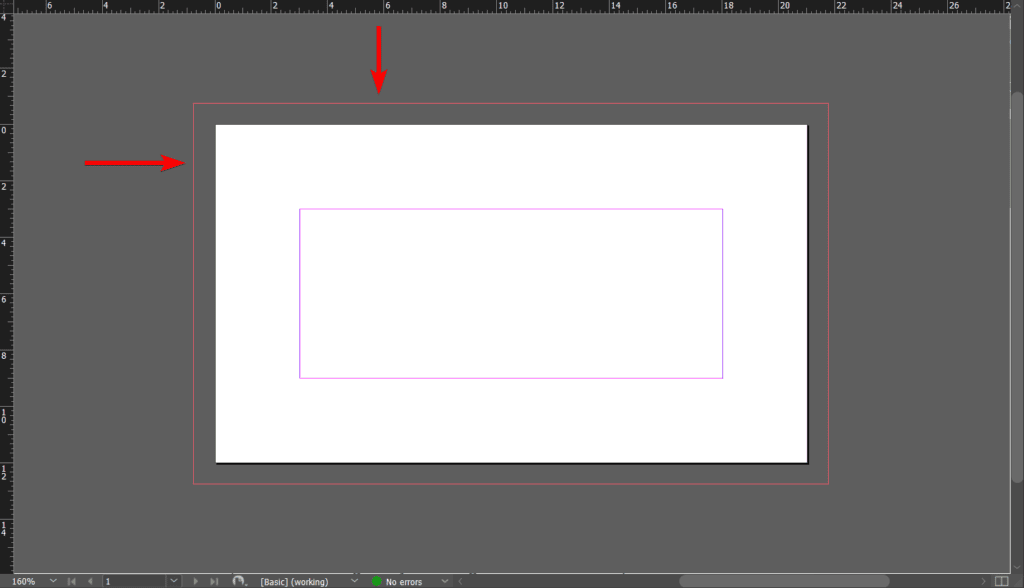
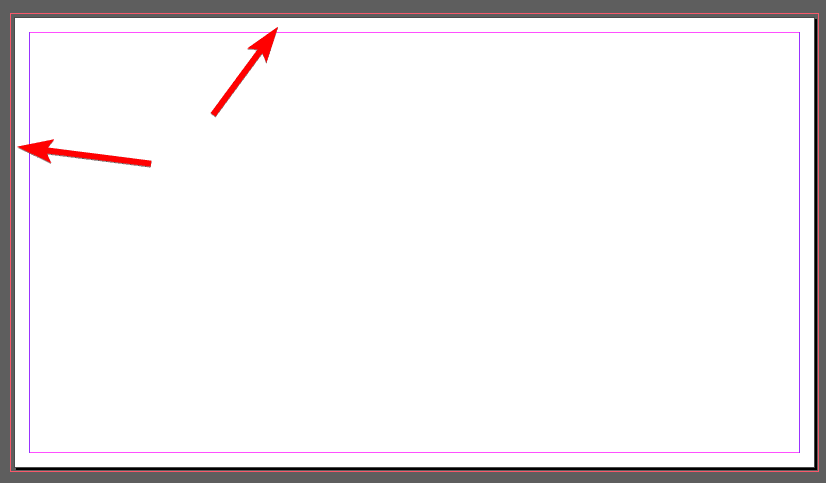
Bleed is the excess area you add around your entire document to allow for printing errors, such as a skewed print, and ensures that the ink reaches the edges of the design after trimming. The bleed area is indicated by red lines around your document in InDesign.
This means your artwork or marketing materials are printed slightly larger than the actual design. Professional printers then cut off the excess areas, leaving you with the intended design size.
You shouldn’t include any vital details in the extra areas you add to your design. The bleed should only consist of the borders of your images that can be cut off, parts of shapes that aren’t needed, and the background if you’ve added a background.
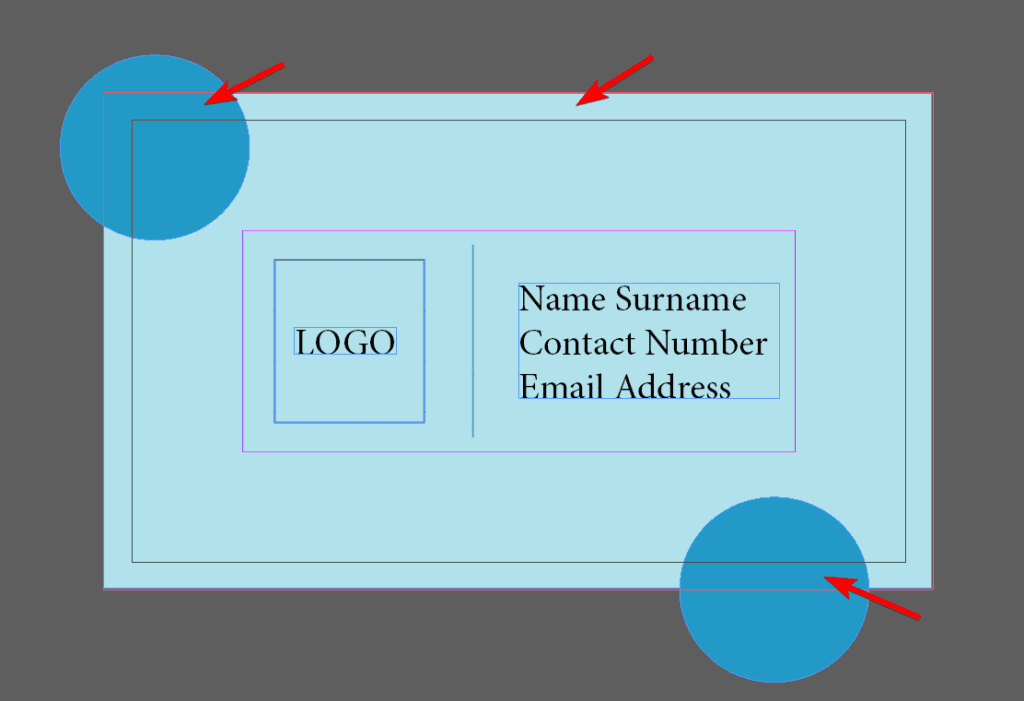
Extending the non-vital elements of your design into the bleed areas ensures that there are no white spaces around the design (in the case of skewed printing or cutting) after it is cut to the correct size.
Generally, the bleed size should be between 0.125 inches and 0.25 inches on each side. However, in large-scale printing, the required bleed may exceed 0.5 inches. Before sending your design to print, you should speak to your design lead or the printers to find out exactly how much bleed is needed for your particular design.
When Should I Use Bleed?
Bleed should only be used on printed material, and no digital designs need a bleed area since there won’t be any trimming required.
On printed materials, bleed is required when you have a background, shapes, or images that extend to the edges of the page. Adding bleed to these documents will ensure a clean and professional look once printed, without any white spaces where the color or image should extend.
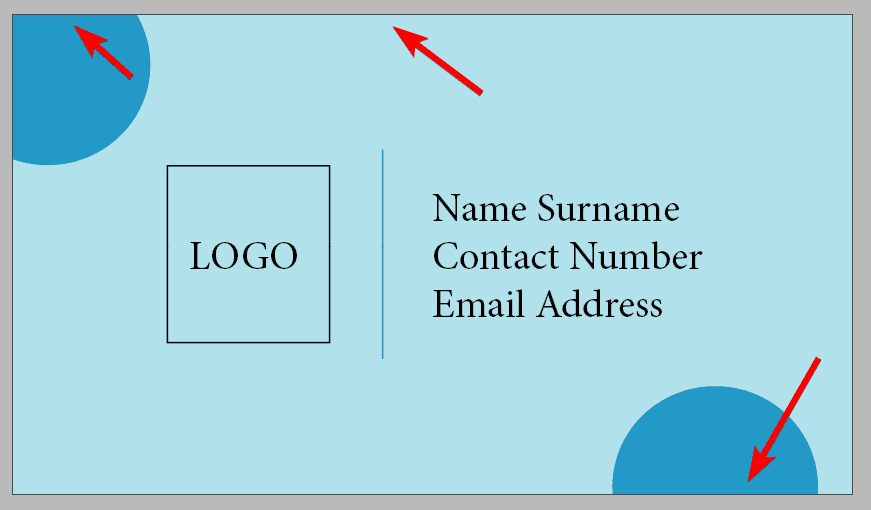
If you have a design with no elements extending to the edge of the page and essentially having a large white border, you don’t need to include any bleed areas.
When printing a design on a single sheet of paper with no binding, such as a business card, flyer, or brochure, you need to add the bleed area to all the edges of the page (top, bottom, left, and right).
When printing a document that will be bound and consists of a layout spread (facing pages), such as a book, you should only include the bleed areas on the outer areas and not on the inside edges.
If you add bleed to the inner pages of a layout spread, it may unintentionally cause the elements on one page to spill over to the next page. The inner edges of a layout spread are pulled into the binding, so no inconsistencies are noticeable.
How to Add Bleed to an Indesign Document
There are two main ways to add bleed in InDesign. You can add bleed when you create a document, or if you are already working on a document and forgot to add the bleed areas, you can add them at any stage of your project.
Method 1: When Creating a New File
The easiest way to add bleed to your document is when creating it. You can add this as a standard step when creating a new document in InDesign.You can change the bleed at any point in your design using the second method.
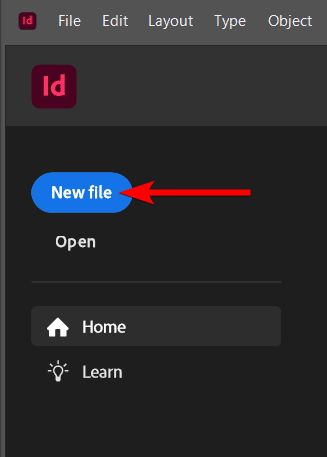
To add bleed at the start, create a new document by opening InDesign and clicking on New file.
The New Document window opens, where you can choose a template or set your page size, whether you want facing pages or not, and your column and margin settings.

Once you have changed the initial settings, scroll down the right-hand panel until you find the Bleed and Slug section.
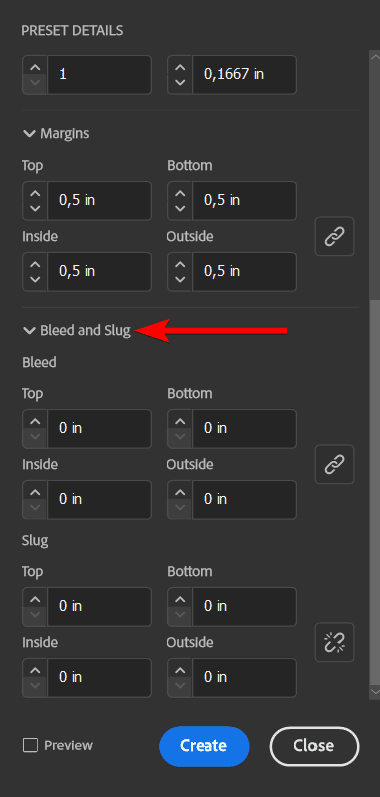
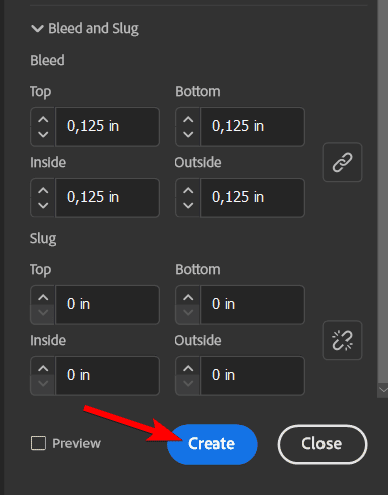
Under the Bleed section, you can input the amount of bleed you want on each edge of the page. You can input different bleed amounts for each side, which allows you to leave a side(s) without bleed.
If you want all sides to have the same bleed, enable the link icon on the right and only input the bleed in one box. The link will copy the bleed amount into all the boxes.
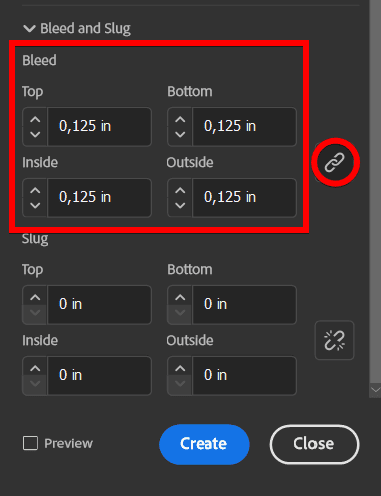
Click Create to open the new document at the dimensions you selected.
Your document will open with the bleed added around the edges, shown by the red lines.
Method 2: Adding Bleed to an Existing Document
If you have already designed your project and remember that you forgot to add a bleed when creating it, you can easily set a bleed on the document. This method also works if you want to change the bleed you initially set for the document.
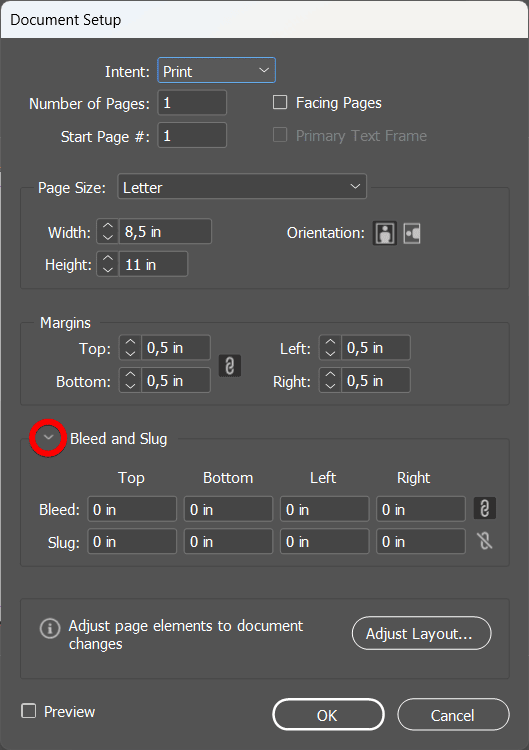
First, open your project in InDesign. Then, go to File > Document Setup or use the shortcut Control + Alt + P on Windows or Command + Option + P on Mac.

Then, click on the arrow to open the Bleed and Slug section near the bottom of the window.
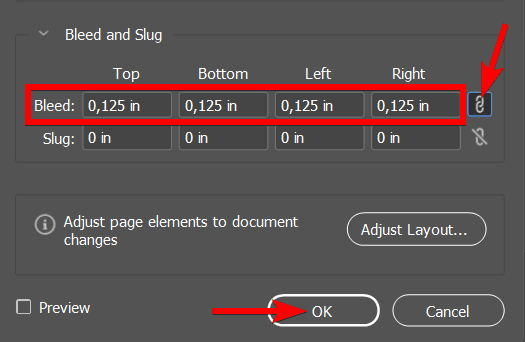
You can now add in the bleed amounts you want to whichever edges. Use the link icon to automatically set all the edges to the same amount of bleed. Click OK to set the new bleed on the document.
You will see the red bleed lines around the document.
How to Export Your Document With Bleed?
Once you have added the bleed to your document, you still need to ensure that you export the file with the bleed. By default, PDFs are saved with no bleed. However, you can easily change this during export. This is also another way to add a custom bleed to your document.
To export a document with bleed, go to File > Export or use the shortcut Control + E on Windows or Command + E on Mac.
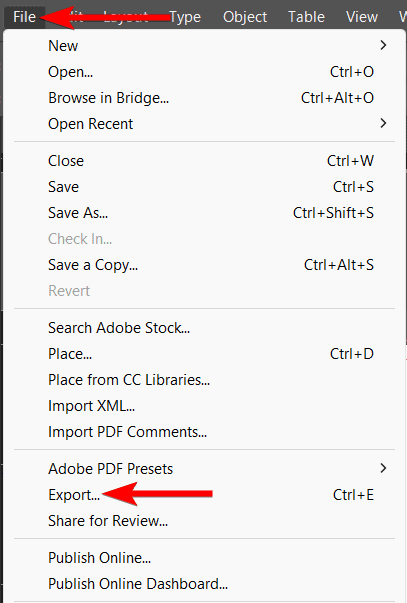
Choose a save location and name the file. Then, set the file type to Adobe PDF (Print). Click Save.

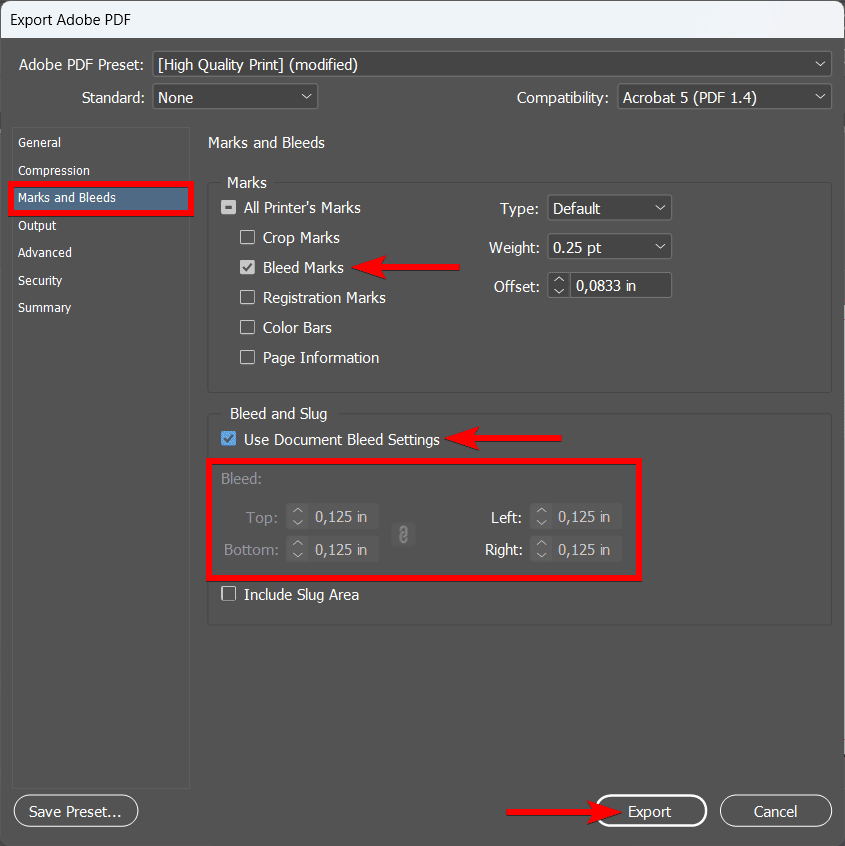
In the Export Adobe PDF panel, adjust the settings in the General tab as you need. Then, open the Marks and Bleeds panel on the left-hand side.
First, check the box next to Bleed Marks in the top section. Next, use the bottom section to set the bleed. You can check the box next to Use Document Bleed Settings if you have already set the bleed on your document. Otherwise, you can type in the bleed amounts you want on your document.
Lastly, click Export, and you will have a document with bleed ready to be sent to print.
👍 Support Us: Subscribe to our channel and help us continue providing these tutorials.
🌟 Regular Updates: We publish how-to videos for InDesign regularly!
🔧 Expert Guidance: Learn Krita from our professionals and uncover exclusive tips!