
When it’s time to hand off your document for printing, exporting your print-ready PDF with bleeds and crop marks is a small but very important step.
Bleeds help the printer align the design and correctly trim it to the right size, so that your finished print piece looks perfect.
Without a printer's bleed your printed materials will look unfinished as the design may be crooked or improperly trimmed.
For this reason, it is important to export your PDF file from InDesign with the bleed and crop marks on it.
Here's how to do it:
- Select File > Export from the top menu
- Select the Adobe PDF (Print) format from the drop-down menu
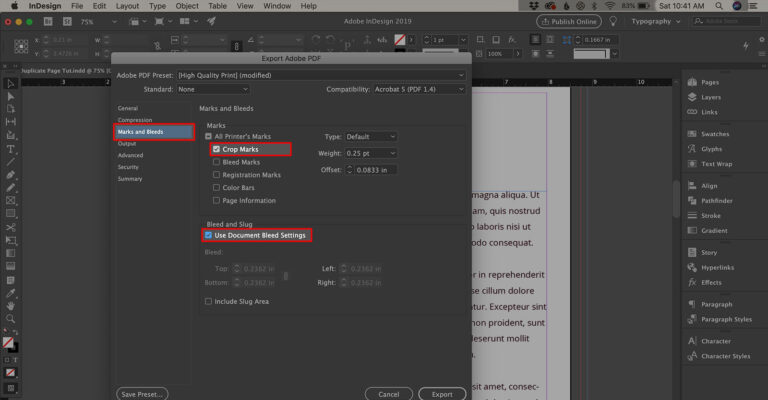
- From the popup window's left-hand menu, select Marks and Bleeds
- Check the boxes next to Crop Marks and Use Document Bleed Settings
- Choose any other export settings you want
- Click the Export button
×
Support us by Subscribing to our YouTube Channel
👍 Support Us: Subscribe to our channel and help us continue providing these tutorials.
🌟 Regular Updates: We publish how-to videos for InDesign regularly!
🔧 Expert Guidance: Learn Krita from our professionals and uncover exclusive tips!