Unfortunately, when dealing with digital art and image editing programs like FireAlpaca, resizing an image will bring in some distortion. As such, there is no real direct way to do it.
You can, however, use the Transform Tool. To resize the whole image, you can also utilize the exporting functionality.
Table of Contents
How to Resize an Image in FireAlpaca
In this guide, we will review step-by-step how to resize an image in FireAlpaca. The steps are as follows: 1) Select the Transform Tool, 2) Select the Transform Tool, and 3) Choose the Different Transform Options.
Total Time: 7 minutes
Select the Transform Tool
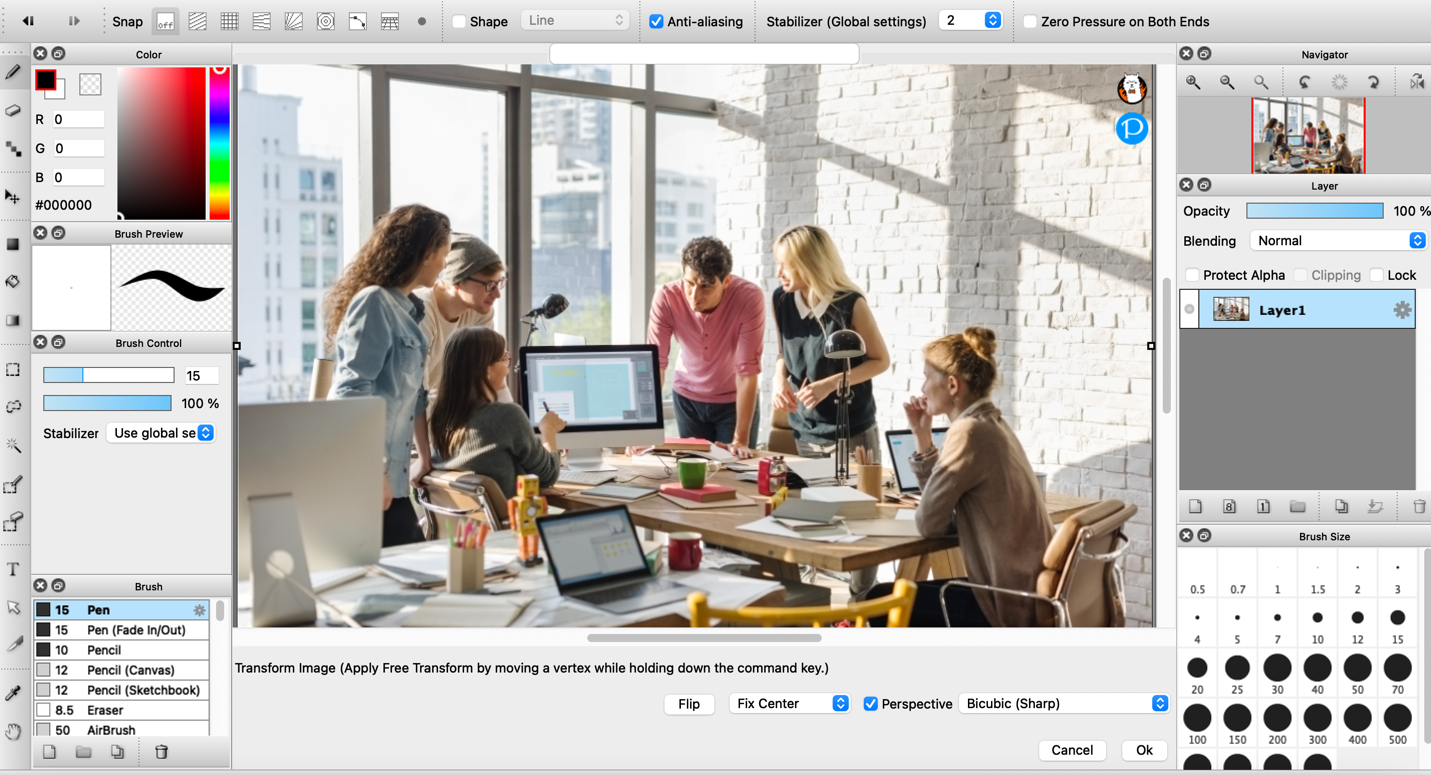
Once you have loaded your original image into the program, the next step is to choose the Transform Tool. The simplest route to this is to use the keyboard shortcut: Ctrl + T for Windows and Command + T for Mac users.
Going with the example on the video, highlight the section of the original image you want to resize. You can do this by putting it on its own layer or simply working on it as a whole; it's simpler if it's on its own layer.
Select the Transform Tool From Menu
If you aren't keen on using shortcuts, the other way to finding the Transform Tool is to click on Select, which can be found on the toolbar at the top of your program window. When you click on Select, a drop-down menu will appear with a host of options. One of those options will be Transform. Click on it.
Since the mouth is on a different layer of its own, when you click Transform, it will be selected and kept on a grid of its own. If you had not put the mouth on a layer of its own, the Transform Tool will select the entire image, and you will have to drag the edges to single out the section you want to resize.
Choose the Different Transform Options
After you click transform, you will see a new toolbar appear at the bottom of your image: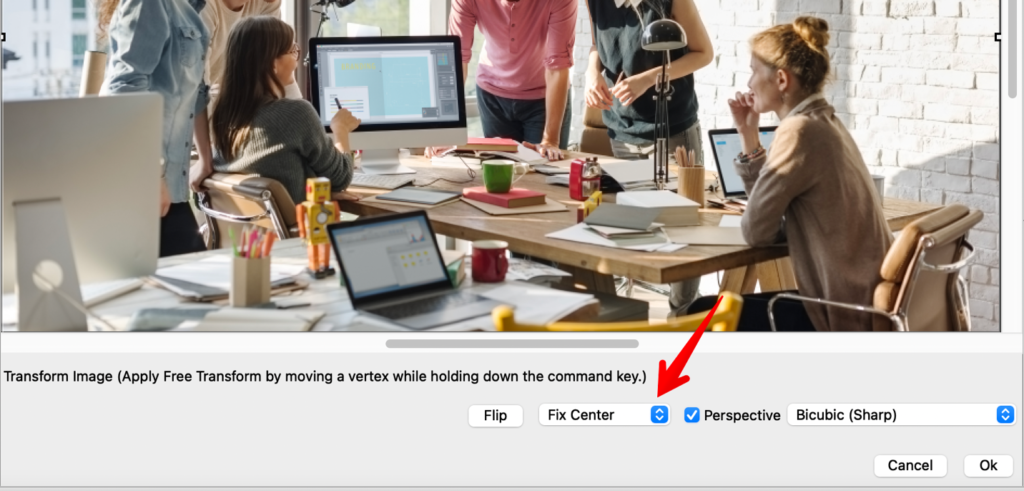
This toolbar has options you can choose from when resizing an image. The program is almost always defaulted to Smooth, but if you choose that, the image won't always appear smooth.
You can also choose the Nearest Neighbor (Jaggiest), which will give you some distortion as well. Most digital art professionals prefer using the third option, Bicubic (Sharp), which gives the best results.
After that, all you have to do is click Okay on the new toolbar where you found these options, and you will have resized a section of the image in FireAlpaca.
Granted, this aspect of the editing tool needs more work since resizing an image will always distort its quality in FireAlpaca. However, using the Transform Tool is the most effective method.
Tools:
- FireAlpaca
General Introduction to FireAlpaca
If you are new to FireAlpaca, we recommend this video to you:
👍 Support Us: Subscribe to our channel and help us continue providing these tutorials.
🌟 Regular Updates: We publish how-to videos for FireAlpaca regularly!
🔧 Expert Guidance: Learn FireAlpaca from our professionals and uncover exclusive tips!