
Cricut Design Space is a program that allows you to design artwork for your Cricut machine. However, some users prefer to create the artwork on another design program first, then transfer it into the program. Inkscape is one of the popular free design programs that some users use to make designs.
Since Inkscape is well-equipped to create intricate and professional vectors, it’s a perfect place to make your designs before transferring them to Cricut Design Space. However, you may wonder how to transfer a design from Inkscape to Cricut Design Space. The key to moving the design is to make an SVG file in Inkscape.
When you have created your design, it’s effortless to transfer it. Here are the simple steps you need to take to transfer your artwork.
How to Transfer a Design From Inkscape to Cricut Design Space?
Before you transfer your artwork, you need to create your artwork in Inkscape. You can start from scratch and design something using vector shapes and the Bezier Tool (B), which is like the Pen Tool in Photoshop, or you can convert a raster image into a vector.
The key here is that you need the design to be made up of paths, which essentially means that it’s a vector. If you want to use text in your design, then ensure you convert the text to a path in Inkscape before you export the file.
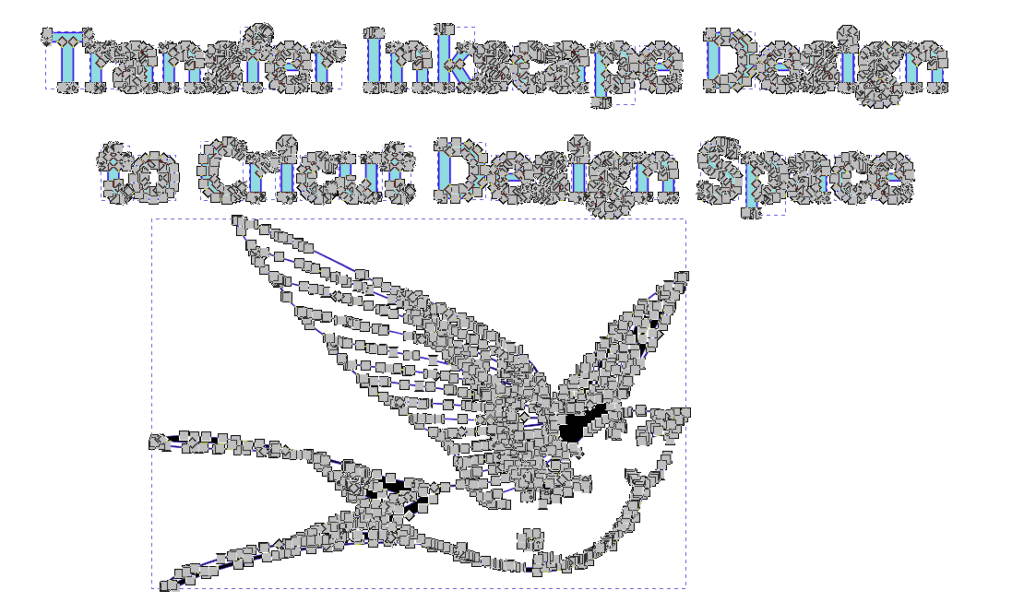
In my case, I will be using this Sketches of Tattoo Design on Paper Beside Drawing Materials image I found on Pexels. I only want the bird from the photo, so I will crop the image in Inkscape and then use the Trace Bitmap function to convert the raster image into vector paths.

You can follow the tutorials in the linked articles above to get your image to a vector path or just create one from scratch using the features in Inkscape, but you need to have a completed design made up of paths.
Here is my bird once I’ve prepared it, along with some text I added and converted to paths.
If you need to check whether your elements are made up of paths, select the Edit paths by Nodes Tool (N) and then click on the element. You will notice gray blocks that show that the elements are paths.
You are now ready to transfer the design to Cricut Design Space.
Now, all you need to do to prepare the file for Cricut Design Space is save it as an SVG file. To save the file, export it by going to File > Export or using the shortcut Shift + Control + E on Windows or Shift + Command + E on Mac.

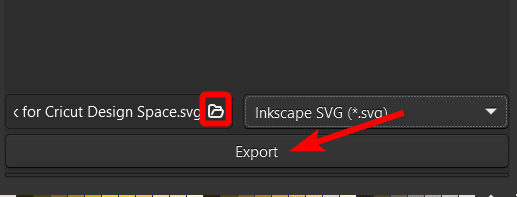
The export options will open in the righthand settings panel, where you can adjust the export options before you save the file. Most importantly, look at the bottom of the panel and click on the drop-down menu on the right to select the file type.
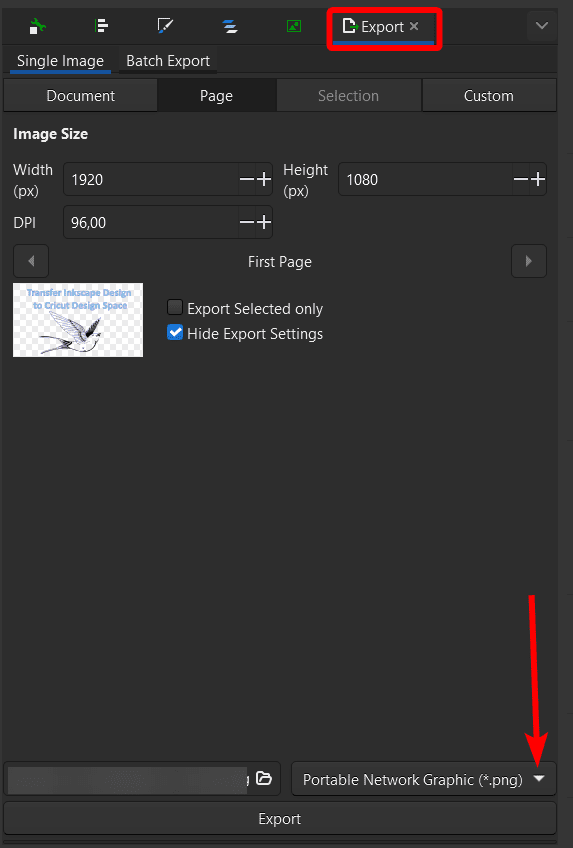
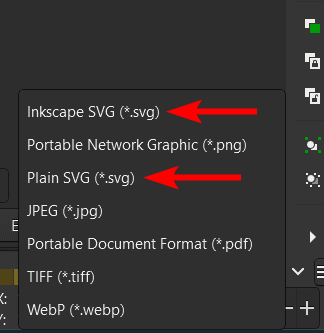
Choose Inkscape SVG or Plain SVG from the options, as either file type works.
Use the folder icon on the left to name the file, select a save location, and then click Export.
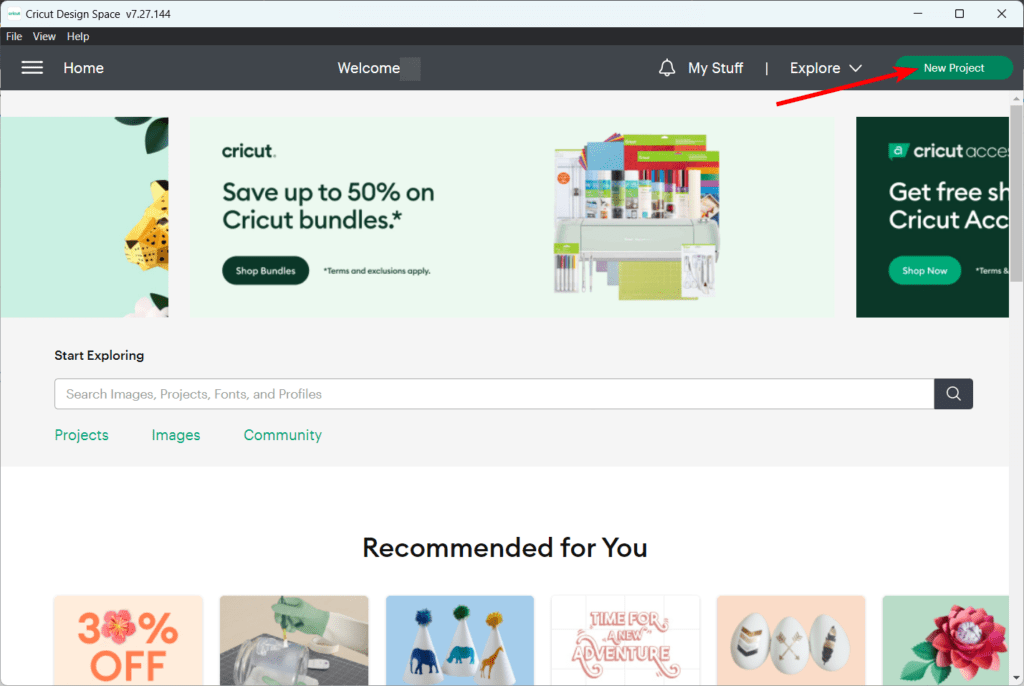
Next, open Cricut Design Space and click on New Project at the top right of the screen.
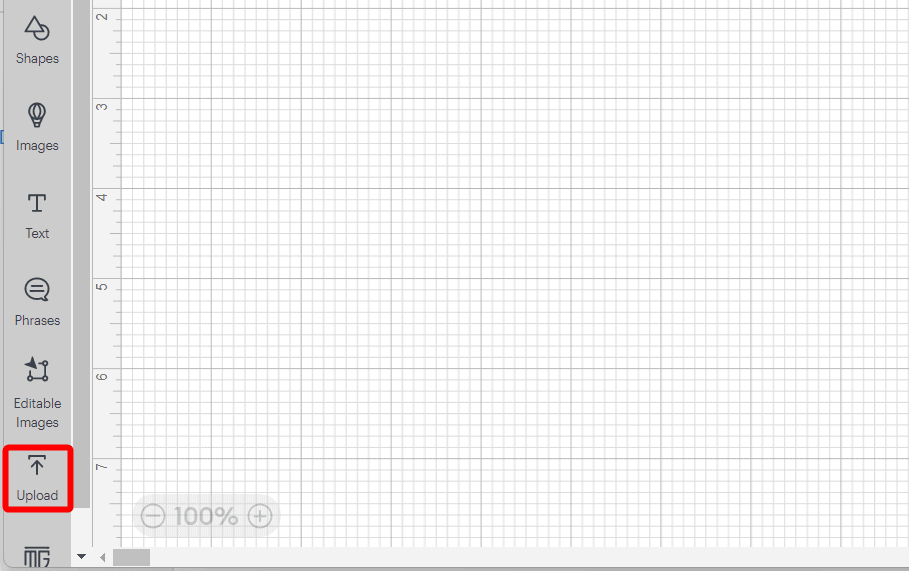
Then, click on Upload from the options on the left-hand side of the screen.
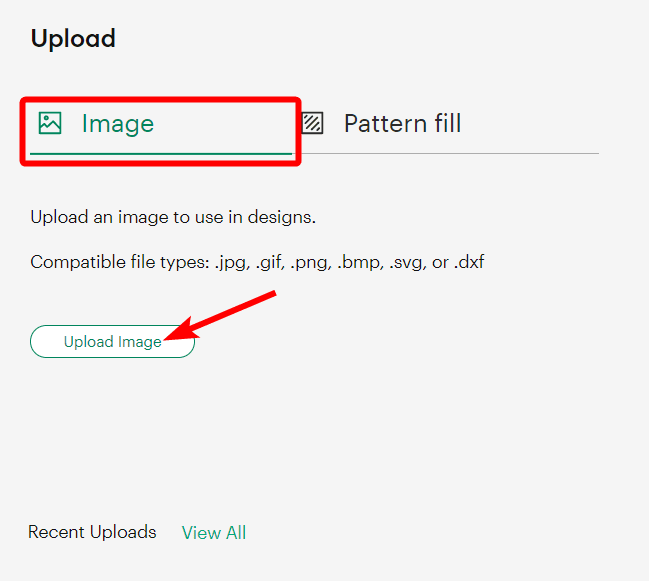
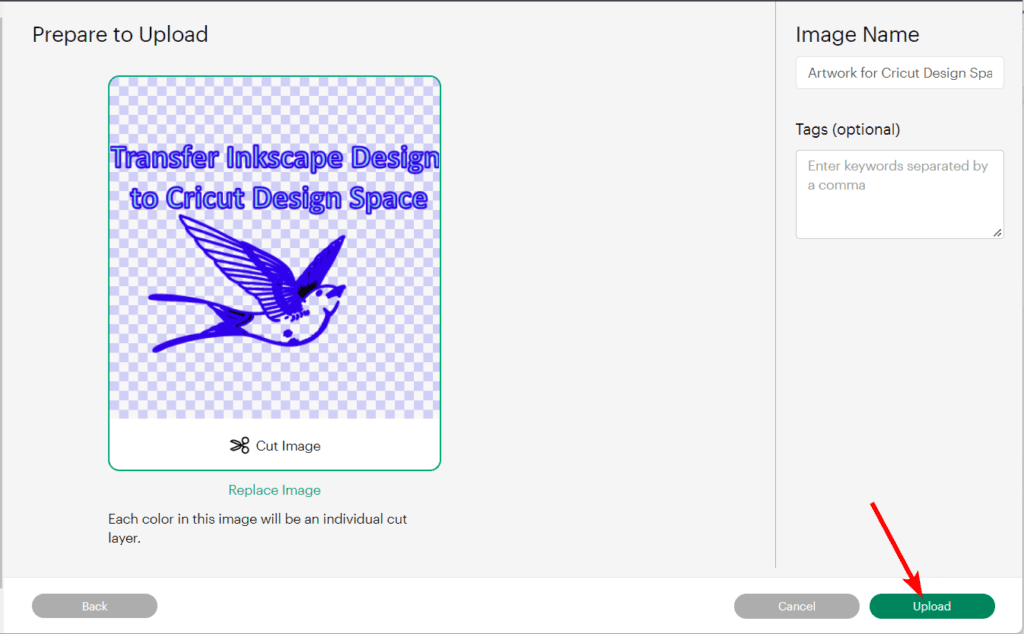
Leave the option as Image and click on Upload Image.
Drag and drop your image in the window, or click on Browse to look for your image in your files and select the file you saved from Inkscape. Then, click on Upload once your image appears in the window.
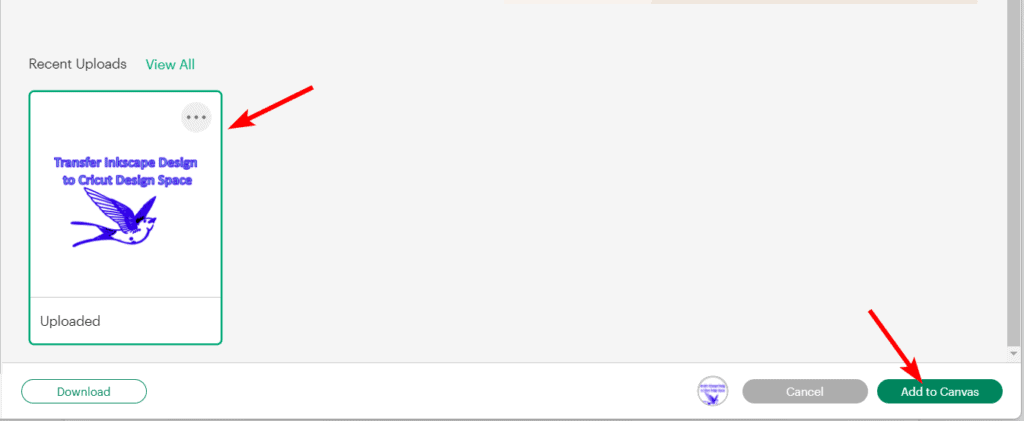
Once your image is uploaded, select it and click on Add to Canvas to place it inside your canvas.
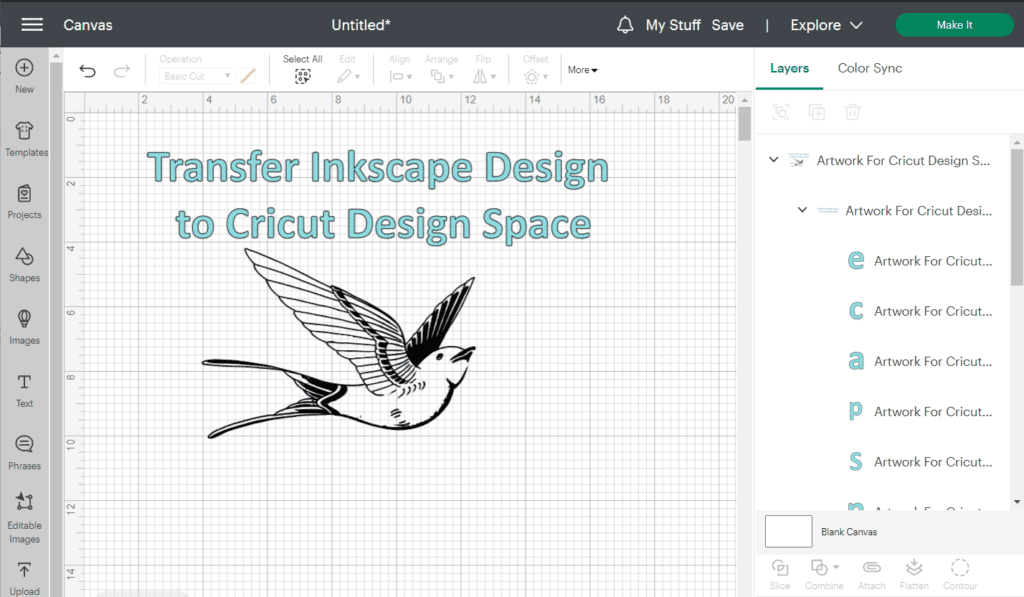
Your design is now in the Cricut Design Space workspace, and you can continue editing it or send it to your Cricut machine.
👍 Support Us: Subscribe to our channel and help us continue providing these tutorials.
🌟 Regular Updates: We publish how-to videos for Inkscape regularly!
🔧 Expert Guidance: Learn Inkscape from our professionals and uncover exclusive tips!
